
Published: August 16, 2026
By Tyler Brooks, Skateboarding Coach
Tyler has coached skateboarders for 10 years and has tested trucks, wheels, and protective gear on real street and park sessions. He leads skill development and safety coverage.
Every skateboard crash I have coached through, or watched over the last ten years of teaching, follows the same few seconds. Your weight drifts off the board, your center of gravity tips past one of the trucks, and the whole event resolves in roughly 1.5 to 3 seconds. Where that sequence ends — a rolled shoulder, a shredded knee, or a fractured wrist — is almost never decided by the fall itself. It is decided by what your body does in the first two of those moments. That is the premise this guide is built on: falling is a skill of its own, and it can be drilled.
I have taught the ollie to hundreds of beginners since 2016, and I can tell you that the skaters who progress the fastest are the ones who drill protective falling in their first two weeks — before they can ollie cleanly, before they can even push without wobbling. In this guide we will walk through the physics of why skaters go down, the step-by-step technique for falling forward, backward, and sideways, the roll-out technique that turns most crashes into a two-second roll, and the exact drills I use with my students to make protection automatic instead of accidental.
The numbers that matter
Wrist, forearm, knee, and head injuries are the most common outcomes of hard skateboard falls — and nearly all of them trace back to two behaviors: a straightened, braced palm, and a head or neck that stops suddenly. Master the roll-out and the wrist-first reflex, and you remove the two most expensive outcomes of your worst falls.
Why skateboarders lose their balance
Skateboard balance is unlike bicycle balance. On a bike, the wheels are fixed in a line and steering gives you a wide, moving base — the bike falls over rather than moving out from under you. On a skateboard, the board itself can travel, twist, and flip, and your entire support base is two small patches of grip tape sitting on trucks that let the deck pivot. That geometry means your center of gravity can leave your support zone almost instantly, with no speed and no obstacle involved.
In my sessions, the same few triggers show up, in roughly this order of frequency:
- The board slips under a foot. Most often, the back foot slides off the tail or the front foot off the nose at a low angle. The board keeps one axis of motion while your body has two — and the mismatch is the fall.
- A foot leaves the board during a landing. Landings demand flat feet. A foot that lands half off the tail is a lever, and a lever under load breaks the trick and the fall both.
- An edge catch. The board’s edge grabs a lip, curb, or chunk of rough concrete and stops abruptly while your body keeps its velocity. This is the single most common cause of hard falls in the park.
- A small lean that compounds with speed. A manual, a nose pick, or a lean off a rail starts at maybe 15 degrees and becomes 60 degrees before you notice it. The fall begins long before it looks like one.
Here is the key point for learning to fall safely: none of these starts at the ground. They start in the relationship between your weight and the board, which is why the first reflex I teach is not about your arms at all. It is about recognizing which direction you are already going.
The first three seconds: how a crash actually happens
Once a tip passes the recoverable point, the crash plays out in a fixed sequence — and the sequence is where the injury is decided. From watching a lot of slow-motion footage of student falls, the order is consistent:
- Recognition (0 to ~0.4 seconds). Pressure under one foot changes, the board rotates under your back foot, or your horizon visually tilts. In a good fall, this is the moment you stop trying to save the trick and commit to the fall.
- Committing the direction (~0.4 to 0.8 seconds). You decide forward, backward, or sideways, and you drop your weight toward that direction. Hesitation is what turns a clean fall into a flailing one — I tell my students to abandon the trick the instant it leaves their control, and most of them only do it after a good bruise teaches them.
- Impact sequencing (~0.8 to 1.5 seconds). This is where most injuries are decided. The human default is to put the palms out to stop the body. On concrete at speed, that puts well over a hundred pounds of force through a wrist that is bent and braced — exactly the mechanism behind the typical skate-related wrist fracture.
- Residual momentum (~1.5 to 2 seconds). After contact, your body is still moving with the velocity it had at the fall. A fall that rolls carries that momentum harmlessly; a fall that slams uses it to load the wrist and leaves the board often rolling back over your feet.
- Recovery posture (~2 to 3 seconds). You are down, the board is somewhere near your ankles, and the choice to get up immediately versus pause and scan is the difference between a one-event fall and a second collision with a rail, a curb, or a skater behind you.
The three-second window has a strict order to it, and every protective technique in this guide is a way of taking control of the moments inside it instead of letting instinct run the menu.
Falling forward off the board: the technique
Forward falls — off the nose or off the tail after a catch — are the most common fall in street skating and the easiest to drill, so we teach them to every new student in week one. The technique I teach has five steps, and each one has a failure mode I have to actively correct:
- Commit to the direction of travel early. The instant the nose or tail dips, drop your center of gravity and let your body flow along with the board’s direction of travel. Mistake to avoid: trying to lift your trailing foot to “save the board.” That motion twists your torso and stiffens your arms, pulling you into exactly the upright, palms-out posture the rest of the technique is meant to prevent.
- Drop low instead of staying tall. Let your body drop to shoulder height on the way down, not head height. A shoulder-height drop puts the shoulder and the side of your rib cage in the contact sequence before the wrist ever gets a chance to brace.
- Roll, don’t slap. As the shoulder touches down, rotate through it — the same motion as a short, fast forward roll, not a full gymnastic one. This converts your forward momentum into rotation, so it does not end in a braced, locked wrist.
- Let the fall finish instead of stopping it. After the roll, let your shoulder and back travel for the last foot or two of momentum, and push the board away from your feet with your foot. The urge to stop your body dead — to slam — is precisely what loads the wrist. A fall that keeps moving for half a second after contact is a fall that cost you nothing.
- Get up in the direction that is clear. If a skater, a rail, or a lane of traffic is behind you, get up and move away in the direction of travel. Rolling backward is fast, but rolling into something is a second event.
The edge-catch fall deserves its own drill
An edge catching a lip or curb is, by far, the most common cause of a hard street fall I see — and it is the one students are least likely to protect against, because it catches them by surprise. The fix is to practice it on purpose: push in at a slow, controllable speed, let the tail or nose catch a low edge, and commit the forward roll-out. Ten minutes of this once a week keeps the reflex honest. I have watched students go from “edge catches are scary” to “edge catches are just a different landing” in a single month.
Falling backward off the board: the technique
Backward falls come from any lean behind the board: a manual taken one pace too far, a kickflip that flies through, a board that travels while your back foot chases it. They are more dangerous than forward falls for two reasons. First, the default response — arms flung out behind you — puts the wrist in an extended, braced position, which is exactly the position that breaks. Second, the body tends to land hard on the back and tailbone, and the head can go last in a way that no piece of gear fully replaces.
- Recognize the lean behind you. A backward fall starts as a subtle shift of pressure toward the heels and a visual cue — the board’s tail drops and your horizon tilts up. Your recognition window is slightly shorter than for a forward fall, which is why I drill the recognition reflex separately before the backward technique.
- Drop the shoulder into the contact sequence, not the head. If the board is leaning back, your body’s mass is already behind it — let the shoulder and upper back take the first contact, with the head last. The failure mode is landing flat on the lower back and tailbone with a straight spine, which is the pattern that leaves the worst bruises in my experience.
- Keep the arms tucked, not flung. The instinct is to fling the arms wide to catch yourself. I drill keeping the elbows close to the body so the shoulder and back take the contact first. If one hand does come down, keep it close to the body and let it roll over — never a straight, locked arm.
- Roll off the board, not off the ground beside it. After contact, rotate your body away from the board’s path. The board is usually still airborne or on its side during a backward fall, and rolling off it avoids getting stepped on it or caught by it during the recovery.
- Scan before you stand. A backward fall often leaves you face-down in the direction of anything you were skating toward — a lane, a stair, a group. A quick look up and around before standing is the habit that keeps a second collision out of the event. In my park sessions, it is the one habit I have had to correct more times than any technique.
Where this guide goes next
You now have the forward and backward contact sequences. The roll-out — the short, controlled roll that most of my best students use to end every fall — is the piece that ties them together. Below is the full roll-out technique, the gear that actually reduces impact, the drills that wire the reflex, and the three fall myths I hear most often from beginners.
The roll-out: turning a fall into a roll
The roll-out is the single most valuable skill in skate-falling, and the reason it works is that it changes what happens the instant your body reaches the ground. Instead of a stopped, braced impact, you get a short, controlled roll that redirects the fall’s momentum into rotation. Think of it as the same motion as a gymnastics forward roll, but shorter, faster, and executed with one rule: the body contacts in the order shoulder, side, back — never the palm — and keeps moving instead of stopping.
- Decide the direction of travel first. If you are falling forward, roll in the direction of travel. If you are falling backward or sideways, a back roll off the shoulder is the cleanest option. The decision takes a fraction of a second once it is drilled, but it is the difference between a roll that ends in a safe position and one that ends mid-traffic.
- Drop the shoulder in, not the head. The shoulder is the first point of contact. In a backward fall, the shoulder is already in that position after the board leans; in a forward fall, you create it by dropping to shoulder height as you commit. Head-first contact is the one this whole technique exists to prevent.
- Roll through the contact, don’t flip over it. The motion is a shoulder roll across the shoulder blade, not a backflip. The head stays low and in line with the spine, and the neck stays neutral. This is where a helmet earns its keep: it protects the head while the neck does the work of rotating the body through the fall.
- Let momentum carry you out of the roll. The fall’s velocity is an asset here. A roll-out uses the momentum of the fall to carry you into the recovery position, and a stopped fall wastes it by loading the wrist. The students who roll out cleanly all have one thing in common: they do not try to stop the fall; they redirect it.
- Recover from the roll with your feet, not your hands. As the roll finishes, drive the back leg down to stand. In my ten years of sessions, I have never seen a student recover faster from a fall than with a clean roll-out — most are upright and moving within two seconds of the contact, which is faster than the reflex time to brace a palm.
- Move out of the board’s path. Once you are up, get out of the rolling line of the board, or pick it up if you can. Leaving the board rolling toward your ankles is the most common way a clean roll-out turns into a second, worse fall — and it is a completely avoidable one.
The roll-out is the first skill I drill with every student, because it is the piece of protective falling that works at every level. A beginner who can roll out of a push will always beat an advanced student who can ollie a gap but slams a palm on every failed landing, and that is a trade I have watched in hundreds of sessions.
What to protect: the contact points that cost the most
You will not always control which part of your body lands, and that is the whole point of protective falling — you practice the parts you cannot control so the ones that do land are the ones you trained. Here is what I have seen, from coaching observations across a decade of sessions, be the highest-cost contacts and what most effectively reduces each one:
| Contact point | Most common scenario | Typical injury cost | What reduces it most |
|---|---|---|---|
| Wrist and palm | Forward fall, palms out | Bruise to fracture; the most common skate injury | Wrist guards + roll-out drill |
| Shoulder | Forward or sideways fall, arm braced | Bruise to dislocation | Roll-out habit; shoulder-first contact drilling |
| Knee | Landing with legs straight | Cuts to abrasions; rare but serious ligament risk | Knee pads for cuts; bent-leg landing practice |
| Lower back and tailbone | Backward fall without a roll | Bruise to fracture | Roll-out technique; consider a back pad |
| Head and neck | Any hard, unexpected fall | Concussion; the catastrophic risk that is rare but career-ending | CPSC- or ASTM-certified helmet, always |
Cost ratings reflect my coaching observations over ten years of sessions, not clinical data. See a physician for any injury that persists beyond a day or two, and get the same-day care for any fall involving the head, neck, or a visible deformity.
Gear that actually reduces impact
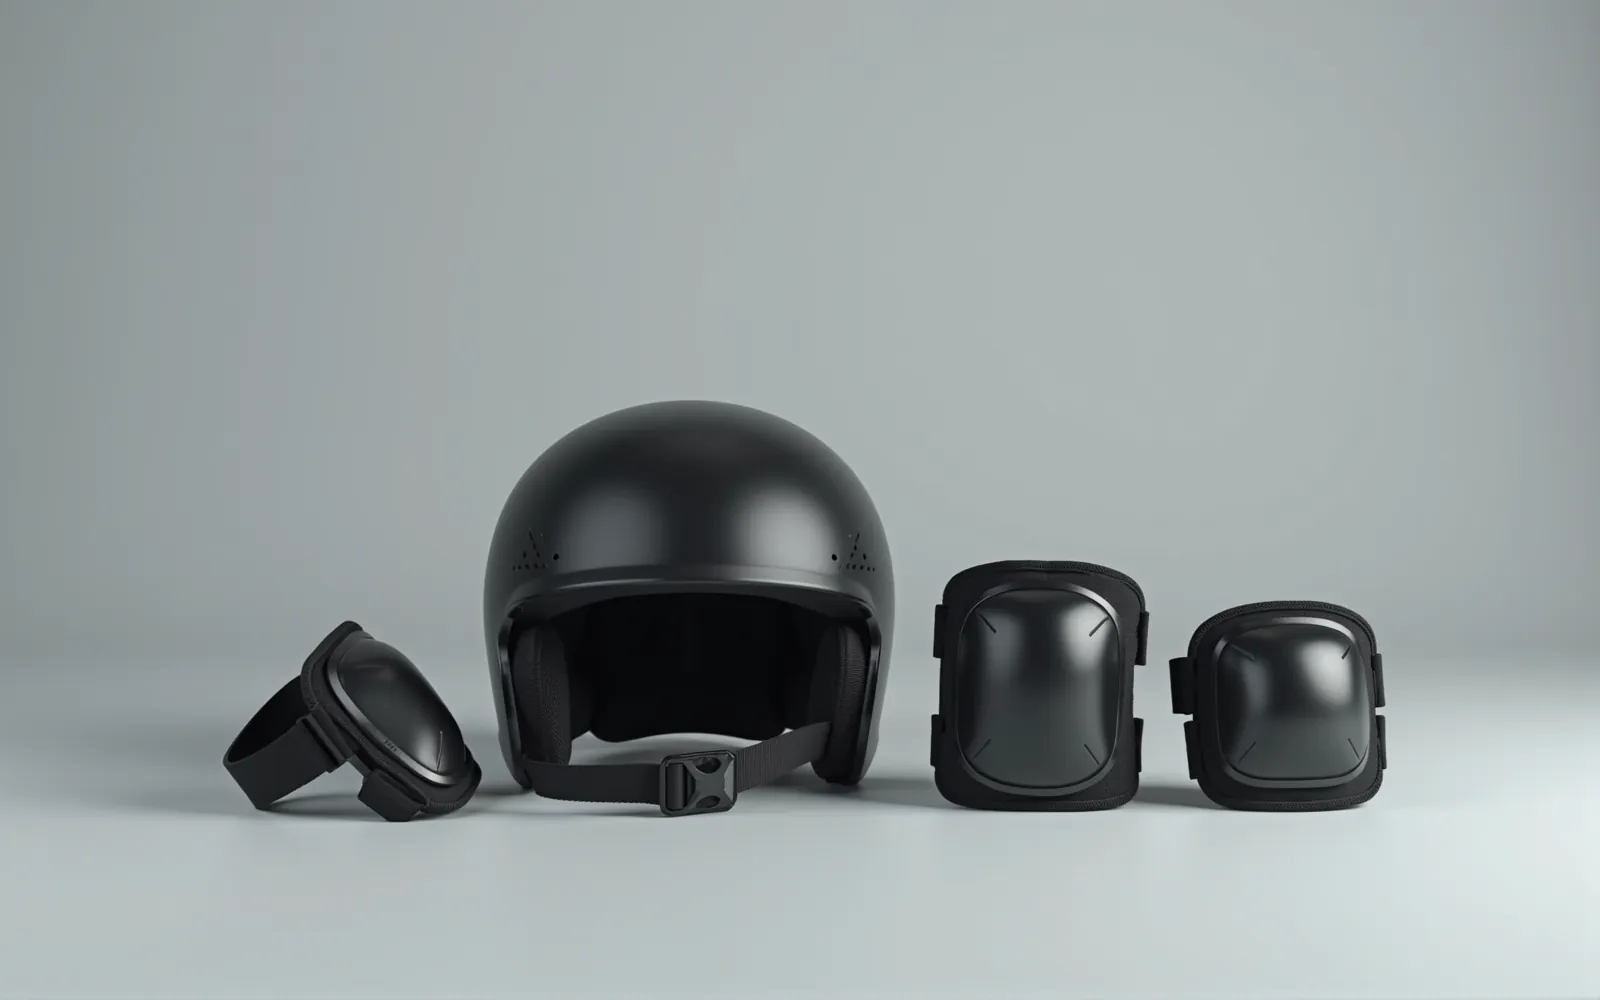
From my sessions, two pieces of gear earn their keep more than any other, and almost no other gear does. Wrist guards are the best value in skate safety — they are the only piece I require from session one, even for a student who is only learning to push. A helmet is non-negotiable when you are learning to fall, because learning to fall means deliberately practicing the moments where the head could hit, and the helmet is what makes that practice survivable.
| Gear | What I look for | Typical price (USD, 2026) | Where to find it |
|---|---|---|---|
| Wrist guards | Palm plate plus wrist strap, low enough to wear under a glove, no migration | $25–$60 | Most skate shops, e.g. World Skateboard or local independents |
| Knee and elbow pads | Hard cap, padded sleeve, strap that holds under pressure | $20–$70 | Skate shops and sporting-goods retailers |
| Skate helmet (CPSC or ASTM-certified) | Certification stamp, snug fit that does not shift, ventilation | $50–$150 | Bike and skate shops; brands like POC make skate-specific models |
| Back pad | Thin enough to wear under street clothes, padded spine and tailbone | $40–$120 | Skate and action-sports retailers |
| Impact suit or padded shorts | Full coverage for vert, big transitions, and learning sessions | $150–$400 | Specialty skate retailers |
Prices are typical 2026 US ranges and vary by brand and region. This is an information site — no affiliate links; pick up any of these at your local skate shop, which is also the best place to try them on before you buy.
Falling in crowds: parks, stairs, and street traffic
The fall I teach in an empty lot is not the fall I teach in a park, a stair set, or a street with traffic. In the park, the board is not the only thing moving — other skaters are, and the board you dropped is rolling somewhere with its own momentum. The single best habit I have drilled into every student across my ten years of coaching is calling your fall out loud: “Down!” or “I’m down!” as you go. It is a small thing, in a half-second, but it is the difference between a clean roll and a collision with a skater standing a few feet behind you. It has kept more students out of the emergency room than any piece of gear I have recommended.
Down stairs, the fall is almost always forward and the board is flying somewhere you do not want it to go. The first step of a stair is the most common contact for a dropped board, and the momentum of the fall is downward. I teach the same forward-roll pattern here, but with one addition: if the board is still airborne or on a stair, roll out of it rather than back into it, and get to your feet fast enough to step off the stair before the board arrives. A board that slides down a stair on you is a board that can take your ankle with it, and the roll-out is what keeps your hand and foot out of its path.
On the street, the fallback risk is other people moving toward you. I teach the same forward-roll pattern, but the recovery is different: if you are in a lane of traffic, get up and move out of the lane rather than rolling out of it, and check that the lane is clear before you re-enter. A two-second roll that ends outside the lane is better than a two-second roll that ends inside it. And the moment you are up, the board is the first thing to get to — it is the most dangerous rolling object in most street situations, and the one your body is least built to dodge at speed.
Drills that turn protective falling into a reflex
The drills below are the exact sequence I run with new students in their first two weeks. Do five to ten reps of each, at a controlled speed, on a smooth surface, with someone watching if you can. The goal is not to fall hard — the goal is to fall in the order you want, and to repeat it until the order is automatic.
- Forward roll from a crouch, no board. On smooth ground, drop from a crouch, shoulder first, roll through to standing. Five reps, one side, then the other. This isolates the shoulder-first contact and the momentum carry-through. Students who nail this have the hardest time doing anything wrong in the next four drills.
- Backward fall, no board, rolling off the back. Stand, lean back into a controlled fall, roll off the shoulder to your back, and get up. Five reps. This is the shoulder-first contact from a back-lean position, and the head-last order I teach for every backward fall.
- Edge-catch practice with a board. Push toward a low lip or curb at a slow, controllable speed, let the tail or nose catch it, and commit the forward roll-out. Three to five reps. This is the drill that makes the edge-catch fall a skill instead of a surprise, and the one I would not skip past if I were learning to fall from scratch.
- Manual with a controlled drop. From a push, lean back into a manual, and at the point past which you would lose it, commit the backward roll-out. Three to five reps. This connects the recognition reflex to the commit reflex, which is where most students are weakest.
- Full-line roll-out. On a smooth line — a flat section, a low lip, a small quarter — practice falling on purpose at a speed that is too fast to save your balance but slow enough to control, and finish with the roll-out and a clean recovery to standing. Three to five reps. This is the drill that wires the entire sequence — recognition, commit, contact, roll, recover — into one motion.
Progress to faster reps once you can complete each rep in under two seconds from first contact to standing. In my sessions, students who run this progression show a visible drop in hard falls by the end of their second week, and the drop holds — the reflex is the hard part, and once it is there, it stays.
Three fall myths I hear constantly
Myth one: wrist guards make you weaker and slower. I have heard this from students who see them as a crutch and from parents who see them as a reason their kid skates “soft.” The reality I have seen in every session is the opposite. Guards do not remove your arm strength; they remove the consequence of one specific reflex — the palms-out brace — which is a reflex your arm has whether you are strong or not, because a fall is faster than a muscle decision. A guard turns a potential fracture into a scrape, and the scrape is the student who comes back the next week instead of the one who does not.
Myth two: you only need a helmet for speed skating. I have seen head injuries in street skating from falls that felt like slow, low-speed events to the skater — a curb catch, a board that flies through, a lip that turned out to be a bit higher than expected. The velocity of the fall is not what makes the head dangerous; the surprise is, and the fact that the skull is the hardest thing on your body landing on the hardest thing on the ground. A helmet is the only piece of gear that makes the practice of learning to fall safe enough to practice, and that is a reason that is not about speed at all.
Myth three: falling means you are not ready for the trick. This is the myth that costs the most beginners the most time. Every student I have coached — including the ones who are now advanced and skating gaps and stairs — still falls every session. The difference between them and the students who have quit is that the advanced skater falls forward, on purpose, in front of friends, and is back up in two seconds, while the beginner falls backward, alone, and spends thirty seconds wondering whether their wrist is broken. Falling is not the opposite of being ready. It is the skill that makes the rest of it possible, and the skaters who treat it that way get to skate the longest.
Frequently asked questions
How do I know if a fall is bad enough to see a doctor?
See a doctor the same day if there is a visible deformity, you cannot bear weight on a limb, you had any loss of consciousness, or you feel numbness or confusion after a head impact. Wrist pain that is sharp when you press on the back of the wrist is the one I tell students to have looked at by a professional, because a small fracture that is missed can heal wrong and leave a lasting stiffness that is harder to treat later than the original injury.
What surface should I practice falling on first?
Start on the smoothest, most forgiving surface you can find — grass, a yoga mat, or carpet — for the first five to ten reps of each drill, then move to smooth concrete for the speed work. The point of the early reps is to learn the contact order and the momentum carry-through, not to survive an impact, and a forgiving surface lets you focus on the form without the pain teaching you the wrong lesson. Once the sequence is automatic, the concrete is where you make it fast.
Do I need gear to learn protective falling?
No — the mechanics, the roll-out, the drops, and the recognition reflexes, do not require any gear. Wrist guards and a helmet are not for the fall itself; they are for the parts of the fall you cannot control. Start with wrist guards from day one if you can, add a helmet before you get on a staircase, a quarter pipe, or anywhere with other people, and add knee and elbow pads as your bruises start to cost you more than the pads cost.
How often do skaters actually fall?
More than most people assume, and the number only goes down as your skill goes up, not because you fall less but because your falls get cheaper. In my coaching sessions, a typical intermediate student has three to six falls in a 90-minute session, and most of them are rolled out and recovered within two seconds. The skaters who fall the least are the ones who practice falling the most, and that is not a contradiction — it is the entire point of this guide.
How long until falling becomes a reflex?
For most of the students I have coached, two to four weeks of consistent practice — the five drills above, three times a week, for about twenty minutes of a session. The recognition reflex is the fastest to build, usually within a week, and the commit-and-roll sequence is the one that takes the full two to four weeks, because it is the one that fights your instinct to save the trick. After that, it is maintenance: one focused session a month in the first month or two of a new season, and the reflex stays with you.
See Also
Essential safety gear for skateboarding (2026) — the full gear rundown that pairs with the fall-protection techniques in this guide.
How to ollie: step-by-step guide — the landing mechanics that put your body in exactly the position this guide protects.
How to choose your first skateboard (2026 buyer’s guide) — board size and flex, the factors that change how a fall feels.
Best skateboard trucks in 2026 — truck width and geometry, the specs that determine how easily your board tips under your feet.
Sources
- U.S. Consumer Product Safety Commission — Helmet Safety Guide (certification standards for protective headgear)
- POC (skate-specific helmet and protective-gear manufacturer)
- Skateboarder (industry trade publication on skateboarding safety and gear)
#Skateboarding #SkateSafely #LearnSkateboarding #SkateSkills #BeginnerSkater #StreetSkating #WristGuards #SkateHelmet #SkateboardingTips #SkateCulture #RollOut #SkateProgression #FallSafely #SkateboardLife #Skate8
This guide is part of the ska8 daily series. Explore more below.