
Published: August 17, 2026
By Tyler Brooks, Skateboarding Coach
Tyler has coached skateboarders for 10 years and has tested trucks, wheels, and protective gear on real street and park sessions. He leads skill development and safety coverage.
The kickflip is the trick that separates riders who can ollie over a gap from riders who can send a clean line down a plaza. It is also the trick I watch people stall out on more than any other. In my sessions, I have seen riders with a clean ollie and a solid boardslide refuse to try a kickflip for an entire season. The problem is almost never balance. It is timing — and not the timing people think it is. This guide breaks down how the kickflip works, the shortest honest path to landing it on flat, and how to progress past the plateau where most people get stuck for months.
What you will get out of this guide
A mechanical breakdown of the kickflip, a 90-day phase-by-phase progression, a mistake-to-fix table covering the five failures I see most, the gear specs that change your success rate, and answers to the five questions riders ask me most.
Table of Contents
- Is the kickflip really the hardest trick to learn?
- What is a kickflip, mechanically?
- Gear and setup that make the kickflip easier
- The 90-day progression: from first attempt to flat-ground landing
- Phase 1: The foundation you need before you touch the kickflip
- Phase 2: Isolation reps that build the new muscle memory
- Phase 3: Putting it together and landing on flat
- The five mistakes I see most often (and the specific fix for each)
- Progressing past the first landed kickflip
- Staying safe while you learn
- Frequently asked questions about the kickflip
- See also
Is the kickflip really the hardest trick to learn?
There is a debate in skating circles about whether the kickflip or the heelflip is harder. I have coached riders through both, and my answer is that the kickflip is the harder first trick to land because it asks your board to rotate in a direction that feels opposite to your foot. The heelflip feels more natural to many people, which is why it lands first for some. But the kickflip is the trick that unlocks the most follow-on tricks. Once you can land a clean kickflip on flat, everything else built from that rotation becomes reachable: the tre flip, the 360 flip, the backside 180 flip, the hardflip, the tail flip, and eventually the 540 and 720 variations.
The other reason riders stall out is that the kickflip punishes inconsistency. An ollie that lands 80% of the time is still a good ollie. A kickflip that lands 20% of the time feels like failure even if the mechanics are partially correct — and that gap is where most riders give up.
What is a kickflip, mechanically?
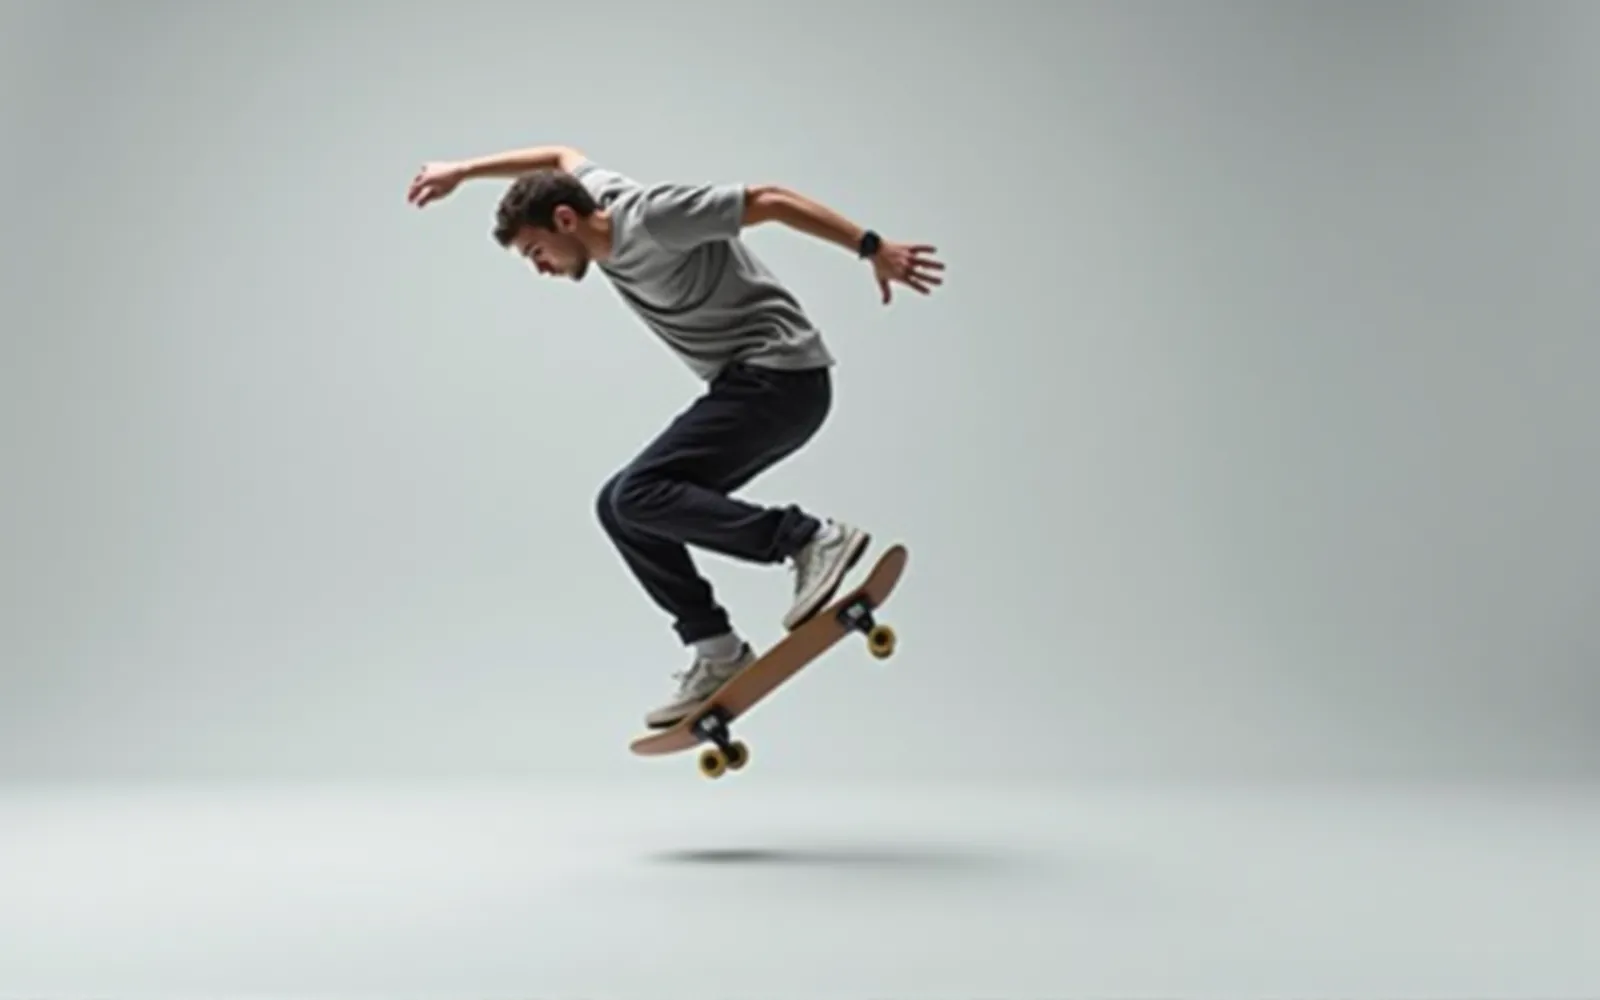
A kickflip is a 360-degree rotation of the board around its long axis, initiated by the front foot and completed by the board spinning in the air before your feet come down on top of it again. The board starts flat, your back foot pops the tail to the ground, your front foot hooks the bottom edge of the board and flicks it up and slightly across the top edge, and the board rolls over in the air. Your feet come up on top of the board at the moment it completes its rotation, and you land flat on top of it.
The critical detail that most first-attempt explanations miss is that the kickflip is not initiated by your front foot. The kickflip is initiated by your back foot, exactly like an ollie. The front foot only does the hook and the flick. If you start with a weak pop, the board does not leave the ground with enough height and energy for the flip to complete, and you catch the board with your back foot or land with your front foot on the nose. In my coaching sessions, I see more kickflip failure from a weak pop than from any other single factor, and it is the first thing I diagnose on a new rider.
The second mechanical detail is the flick direction. The front foot hook catches the bottom edge of the board and rotates the board around its long axis. The flick is not a straight forward motion. It is a short, clean, slightly upward and outward motion that catches the bottom of the board and rotates it forward. The faster your ollie, the less aggressive the flick needs to be, because the board has more time in the air to complete the rotation. The slower your ollie, the more aggressive the flick needs to be, and that is where most beginners struggle. They try to flick the board over with their front foot because their back foot does not pop it high enough to give the board time to rotate on its own.
A useful mental model is that the kickflip is a 50/50 responsibility. The back foot owns the pop and the height. The front foot owns the hook and the timing of the flick. Neither foot can do the trick alone. Riders who are strong on one foot and weak on the other will plateau at a 20-30% landing rate, and the fix is always in the weaker leg, not in more attempts of the full trick.
Gear and setup that make the kickflip easier
Before you spend a season learning the kickflip, I want to make sure your setup is not creating extra work. There are a few specific gear choices that meaningfully change the difficulty of the kickflip for a learning rider, and none of them are expensive.
Grip tape matters more than most people think
A board with fresh, full-coverage grip tape catches your front foot more reliably on the hook. A board with worn, shiny, or partially worn grip tape will slip out from under your front foot at the moment of the flick, and the board rolls over a little faster than you expected. I have seen this one small gear difference account for a 10-15 point drop in kickflip landing rate across a whole season.
Here is the gear checklist I run through with new kickflip students. None of these items are optional, but none of them are expensive either.
| Gear element | Why it matters for the kickflip | What to look for |
|---|---|---|
| Grip tape | Reliable front-foot hook without slipping | Fresh, full coverage, not worn shiny in the flip zone |
| Wheels | Rollability on flat for consistent approach speed | 52-54mm at 99a, clean and not flat-spotted |
| Bearings | Consistent roll and predictable board speed | ABEC 7 or Skated rating, recent service |
| Trucks | Stable pivot for the pop phase | 14.25-14.75 inch width for 8.25-8.5 inch deck |
| Deck | Predictable pop without excessive flex | 8.0-8.25 inch wide, moderate flex, clean concave |
Spec references drawn from standard street-board sizing guidance; individual preferences vary. See the linked gear-reviews articles for a deeper breakdown of each component.
The 90-day progression: from first attempt to flat-ground landing
I teach the kickflip in three phases over the first 90 days, and I will be direct about what each phase looks like and what it does not. Phase one is not the kickflip. It is the setup. Phase two is the isolation work that builds the new muscle memory without the pressure of landing the full trick. Phase three is the full trick and the first landed kickflip on flat. Most riders who stall out at the kickflip have skipped at least one of these phases, and the fix is to go back and do the skipped phase for a week before trying the full trick again.
Phase 1: The foundation you need before you touch the kickflip (weeks 1-3)
Before I will let a rider attempt a kickflip, I need to see three things. First, a clean ollie that lands flat on both feet, at least 2.5 feet high, 8 out of 10 times, on flat. Not the theoretical best ollie, but the reliable, repeatable one. Second, a stable approach ride, where the rider can ollie in a straight line without over-committing forward or drifting laterally. Third, a comfortable front-foot position, where the rider can place the front foot in the kickflip position (slightly further forward than the ollie position, toes on the grip, heel free) without losing balance.
If any of those three things is not solid, the kickflip will not be learnable in the way I describe in this guide. I have tried to rush riders into the kickflip with a weak ollie, and it does not work. The board does not give you the same amount of air to work with, the rotation feels wrong, and frustration builds. Give the foundation two to four weeks. It is the cheapest way to make the rest of the 90 days go well.
Phase 2: Isolation reps that build the new muscle memory (weeks 4-8)
Phase two is the phase where the new motion actually gets built. The trick here is to practice the components of the kickflip in isolation, in a low-pressure way that lets you feel the rotation without the consequence of landing a full 360-degree flip. The specific drills I use:
- Front-foot hook, no pop. Stand on the board in the kickflip foot position. Practice the front-foot hook, catching the bottom edge of the board and flicking it forward, without the back foot popping. The board should rotate about 90 degrees and stop. This isolates the hook and lets you feel the rotation direction without the variable of the pop.
- Partial flick, no catch. Ollie up, and as the board reaches its peak, practice the front-foot flick without trying to catch the board. The goal is to feel the flick and let the board complete whatever rotation it does. Do not try to land it. Just feel the flick.
- Front-foot catch, no flick. Ollie up, and as the board reaches its peak, practice bringing the front foot down on top of the board and landing it. This is the opposite of the kickflip, but it builds the foot-travel-to-catch motion that you will need in phase three.
- Full kickflip, no landing. Put the hook and the flick together, do the full rotation, and let the board rotate out from under you. Do not try to land it. The goal is to feel the full rotation and see whether the board completes the 360 or stalls out at 270. This tells you whether your flick is aggressive enough.
I do about 20 to 30 reps of each of these four drills per session, and I recommend riders do the same. The reason for the low rep count per drill is that the kickflip is a timing skill, not a strength skill. Ten clean, focused reps with good form will teach you more than fifty sloppy ones. And if you are not feeling the rotation in a drill, that is a signal to stay in that drill for a few more sessions, not to move on.
Phase 3: Putting it together and landing on flat (weeks 9-13)
Phase three is where you try to land the full kickflip. The key change from phase two is that you are now committing to landing the board, and you are bringing both feet up on top of the board at the moment it completes its rotation. The specific sequence:
- Pop the tail cleanly, exactly like your best ollie. Do not change your pop for the kickflip.
- Hook with the front foot at the peak of the ollie. The hook should be fast, clean, and slightly upward. You are catching the bottom edge of the board and rotating it forward.
- As the board rotates, both feet come up on top of the board. The back foot drives down slightly to keep the board level, and the front foot meets the back foot on top of the board.
- Land flat, with both feet on the grip tape, and roll through. Do not try to stop your forward momentum on the landing, and do not grab for balance as you land. Your feet should already be in the right place from the foot-travel motion you built in phase two.
In my sessions, most riders land their first kickflip on flat somewhere between session 30 and session 60 in phase three, and a few land it on session five. The difference is not talent — it is how cleanly they built phases one and two. If phase two was skipped, phase three will take longer. Build it cleanly and you will be at 50-60% by the end of the 90 days, 80%+ by day 150.
The five mistakes I see most often (and the specific fix for each)
Over ten years of coaching, these are the five mistakes I see in the most kickflip attempts, and these are the fixes I give, in the order I would diagnose them.
| Mistake | What it looks like | The fix |
|---|---|---|
| Weak pop | Board does not reach full ollie height before the flick | Go back to phase one. Ollie flat, 2.5 feet, 8 in 10, before trying the kickflip again. |
| Late hook | Flick happens after the board has started to descend | Practise the front-foot hook in isolation. Hook at the peak of the ollie, not on the way down. |
| Over-flick | Board completes 360+ and rotates past your feet | Soften the flick. Use a faster pop to give the board more time, and let the board rotate on its own. |
| Feet not on top of board | Board lands in front of or behind your feet | Practise the front-foot catch and the back-foot drive in phase two. Land with both feet on the grip, not chasing the board. |
| Stiff landing | Knees locked at impact, board snaps out | Bend your knees on the way down, before you land. Absorb the impact with your legs, not with your balance. |
Diagnose your specific failure mode once, fix that one thing for two to three sessions, and do not move to the next mistake until the first one is resolved. Trying to fix all five at once is the fastest way to stall out on the kickflip for a season.
The most expensive mistake: trying to land it on a ledge or down the ramp before it is clean on flat
I watch riders try to land their first kickflip on an 8-inch ledge, or down a small transition, before they have landed it five times in a row on flat. It does not work, and it builds a fear response to the kickflip that takes longer to clear than the skill itself would have taken to learn. Build the flat-landing rate to 5 clean attempts in a row before you even think about putting the kickflip on a feature. That is the only path that works.
Progressing past the first landed kickflip
Once you have landed the kickflip on flat at a 50%+ rate, there are four progression paths, and which one you pick depends on what your other tricks can support.
- Cleaner, faster, more consistent. The most underrated progression is to land the same kickflip on flat at 80%+ before moving on. A kickflip that lands 50% of the time is not a reliable trick for a line. A kickflip that lands 85% of the time is. Spend a month on the clean version before you move to the next trick.
- Kickflip on a small obstacle. A 4-6 inch ledge, a single stair, or a small box is the next logical progression. The obstacle adds a commitment to the landing and forces you to be cleaner on the catch. Start low, stay close to the ground, and build the ledge work slowly.
- The 180 kickflip (varial kickflip). Adding a 180-degree body rotation on top of the board rotation is the natural next trick. It reuses the same hook and flick, and the only new variable is the body rotation. If your kickflip is clean and your 180s are solid, this is usually the fastest progression.
- The tre flip (frontside 180 flip). A frontside 180 with a kickflip rotation, the tre flip is the trick most riders reach after the kickflip. It is easier than it looks because the body rotation gives you more time to complete the board rotation, and it is a natural follow-on to a clean kickflip.
Staying safe while you learn
The kickflip is a high-fall-rate trick, especially in the first 30 days of learning. My coaching protocol is simple. Wear a helmet, wrist guards, and knee pads for the first few weeks of phase two and all of phase three. Not because the kickflip is a dangerous trick, but because the fall rate is high, and repeated minor impacts build up into overuse injuries over a season. The wrist is the most common injury I see in kickflip learning, and it is almost always from a fall where the rider caught the board with their front foot and the rotation carried the hand out from under them. Wrist guards take the impact off the wrist and onto the glove, and they are cheap enough that the cost of one pair of wrist guards is far less than the cost of one wrist injury over a season.
Learn the kickflip in a flat, low-traffic area, not a busy plaza. A flat, empty parking lot or a quiet park corner is the ideal environment, because you have room to roll through a landing and no traffic to worry about.
Frequently asked questions about the kickflip
How long does it take to learn a kickflip?
With a solid ollie and four to five sessions per week, most riders land their first kickflip on flat between 30 and 60 days of dedicated practice. Riders who skip phase one or two will take longer. There is no talent threshold, but there is a consistency threshold, and that is the one most riders do not hit.
Is the kickflip or heelflip harder?
The kickflip is harder to land first for most riders, because the hook-and-flick is a new motion and the board rotates in a direction that feels counter-intuitive. The heelflip feels more natural to some riders and lands first for them. But the kickflip unlocks more follow-on tricks, so if you are choosing one to learn first, I choose the kickflip.
Do I need a specific board to learn the kickflip?
No. A standard 8.0-8.25 inch street deck with moderate flex, clean concave, and fresh grip tape is the right board. You do not need a specialist kickflip board. The gear that actually matters is fresh grip tape, clean wheels, and serviced bearings — if your grip tape is worn shiny in the flip zone, replace it, because it is the cheapest fix with the biggest impact on your landing rate.
How many kickflips per session should I attempt?
In my coaching sessions, I cap a learning rider at 30 to 40 full attempts per session, with the rest of the session spent on the phase two isolation drills. The kickflip is a timing skill, and timing degrades with fatigue. The last ten attempts of a session are where most of the bad habits get built, because your feet are tired and your timing is off. Stop when your clean attempts start to drop, not when you run out of will.
What should I do if I have landed the kickflip 20 times and still cannot land it on a ledge?
That is a commitment issue, not a skill issue. The kickflip on a ledge is the same trick as the kickflip on flat, with the added commitment that the ledge is there and you have to land over it. The fix is not to try the ledge more, it is to go back to flat and land 30 clean kickflips in a row, and then come back to the ledge. The skill is already there. The commitment is what is missing, and commitment is a separate skill from technique, and it is the one that takes longer to build than either.
Sources
- Thrasher Magazine — skateboarding culture, technique, and pro rider analysis
- Indy Trucks — street and freestyle truck geometry and specification reference
- U.S. Consumer Product Safety Commission — protective equipment and helmet safety standards for skateboarding
See also
These related articles on Ska8 go deeper on the foundation skills and gear choices that this guide builds on:
- How to Ollie: Step-by-Step Guide for 2026 — the foundation trick the kickflip is built on
- How to Fall Safely on a Skateboard: 2026 Step-by-Step Guide — the fall mechanics that keep you safe while you learn the kickflip
- Essential Safety Gear for Skateboarding — the helmet, wrist, and knee gear to have before your first kickflip session
#Kickflip #HowToKickflip #SkateboardTricks #Skateboarding #LearnToSkate #Skateboarding2026 #Ollie #SkateTricks #StreetSkating #SkateCoach #SkateboardSetup #SkateGrip #SkateboardDeck #TruckSetup #SkateProgression #Ska8Skating
This guide is part of the ska8 daily series. Explore more below.