
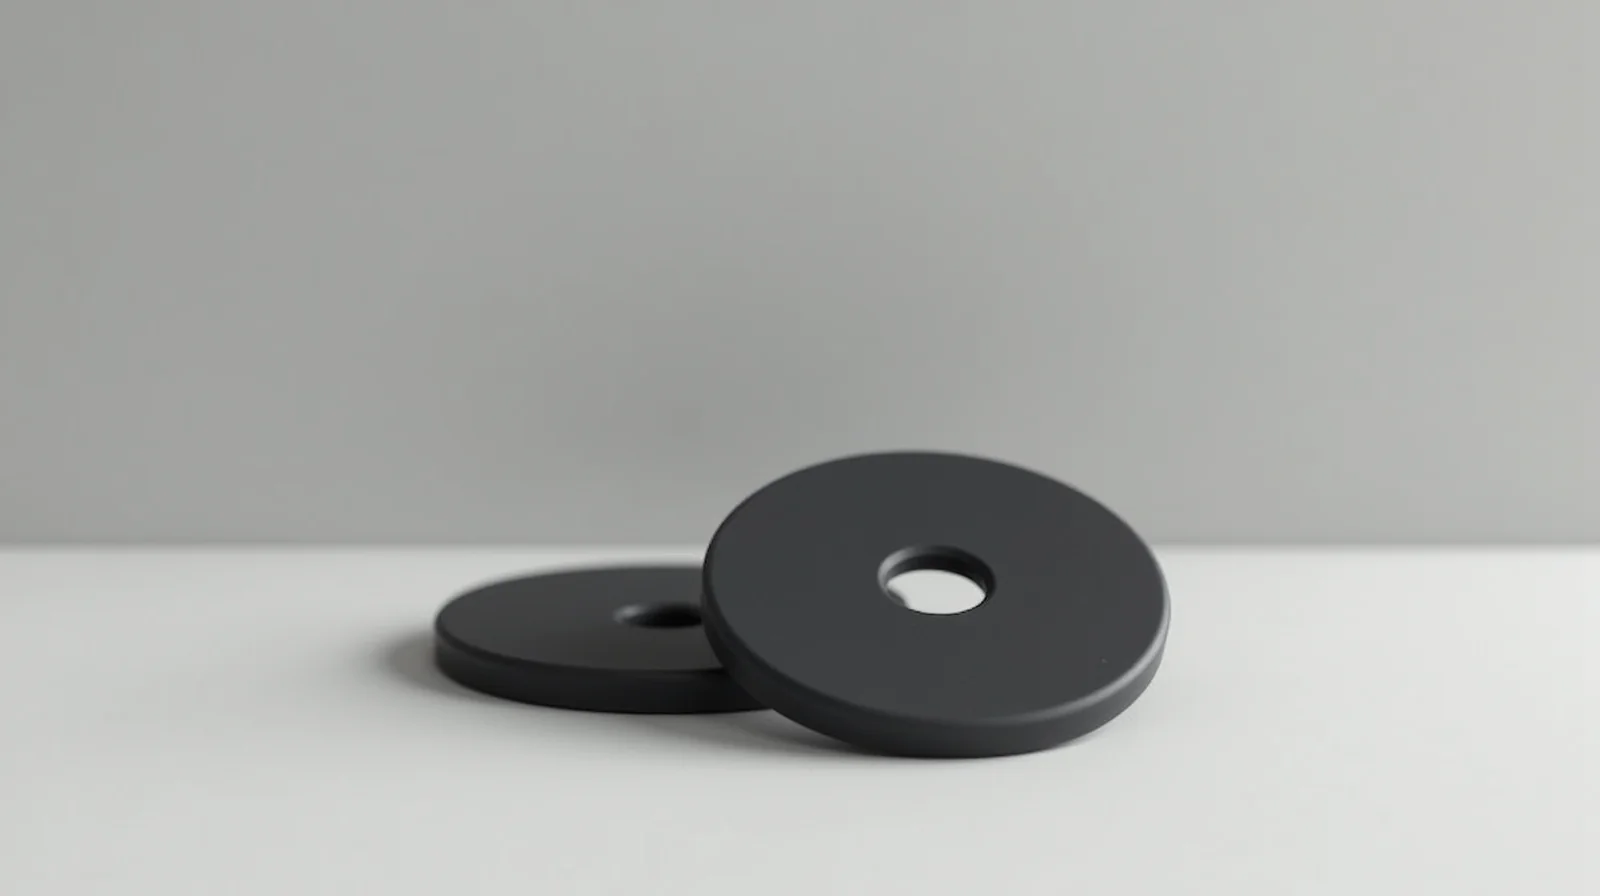
There is a very specific kind of skateboard pain that never makes it into a trick clip: the sharp thud of your wheel clipping the deck the moment you push down. If you ride a 54mm or larger wheel on a board under 8.0 inches wide, you have probably felt it — and it quietly caps how hard you can ride, how deep you can drop a manual, and how relaxed you can stay on a ledge.
Riser pads are the small, cheap, often-overlooked fix. These thin polyurethane discs sit between your trucks and deck, lifting the axle just enough to create clearance. Get the size right, and your board feels calmer at speed and more stable in deep manuals. Get it wrong, and you have added a wobble you have to skate around all year. In this guide, I break down riser pad sizing, how they change your board feel, how to install them, and which sizes I actually recommend — based on years of building test boards for gear coverage.
By Mia Torres, Skate Gear Reviewer
Mia has spent 7 years testing skateboards and protective gear, covering everything from beginner setups to advanced street rigs.
Published: September 8, 2026
Quick Answer
Riser pads are 1/8″ (3mm) or 1/4″ (6mm) polyurethane spacers that add axle height so bigger wheels do not hit the deck. If you ride 54mm+ wheels on a deck narrower than 8.0″, they are worth adding. They cost $5-$12 for a set of eight, install in about 15 minutes with a T-tool, and noticeably improve stability — they do not meaningfully hurt your ability to flip, but they do change your board feel, so read the stability section before you buy.
What Are Riser Pads and How Do They Work?
A riser pad is a flat disc — usually polyurethane, sometimes plastic — with a hole in the center that matches your truck bolt pattern. You stack one or two of them on the deck, directly under each hanger, before you bolt the trucks down. The pad lifts the truck, and therefore the axle and the wheel, away from the deck.
The reason that matters is geometry. A standard street setup — 7.5″ to 8.0″ deck, 50-53mm wheels, stock bushings — is tuned so the wheel sits just clear of the deck when the trucks are at full lean. Push the wheel size up by 2mm, and at full lean the wheel contacts the deck. That contact is called wheel bite, and it is not just an inconvenience: at speed it can pin the truck and snap the board sideways out from under you. Riser pads restore that clearance without changing anything else about the build.
From building a lot of test boards, the mental model I use is simple: riser pads are a trade. You buy clearance and stability, and you pay for it with a slightly taller axle and a little more flex in the stack. The trade is almost always worth it if you ride large wheels, but it is a real trade, and that is why sizing them correctly matters more than the brand you pick.
Why Riser Pads Exist: The Wheel Bite Problem
Every skateboard has a built-in limit on how big the wheels can be before the deck and wheel start fighting each other. That limit comes from three things working together: your deck width, your wheel size, and how far the trucks can lean before the wheel touches the deck.
When you ride a narrower deck, the trucks sit closer to the edge of the board, which gives the wheels less room to lean without clipping. When you add bigger wheels, you increase the wheel diameter and push that contact point closer. And when your bushings are soft, the trucks lean further, which brings the wheel into the deck even faster. Any one of those three can trigger wheel bite, but together they make it common.
Wheel bite is the moment the wheel grinds against the deck. On a casual push it sounds like a high-pitched screech and slows you down. On a hard carve at speed, it can lock the front truck, snap the board out, and throw you over the handlebars. That is why the fix is not optional for people who ride fast or deep.
Riser pads are the cleanest fix because they address the root cause — axle height — without requiring you to change your deck, your wheels, or your bushings. You add a few millimeters of clearance and the geometry resolves. The alternative fixes, like running bigger decks, harder bushings, or smaller wheels, all cost you something else you may not want to lose.
When You Actually Need Riser Pads
Not every board needs risers. If you are running a 50mm or 51mm wheel on a deck 8.0 inches or wider with medium bushings, you probably have enough clearance to ride comfortably without them. Adding risers to a setup that does not need them just makes the board taller and less responsive for no real benefit.
You do need risers when any of the following is true:
- Your wheels are 54mm or larger. This is the most common trigger. 55mm, 56mm, and 60mm wheels on a standard street deck will almost always bite without risers.
- Your deck is 7.5 inches or narrower. Narrower decks have less room for the trucks to lean, so they hit the deck sooner. A 54mm wheel on a 7.5″ board is a classic riser situation.
- You run soft bushings (78A or below). Soft bushings let the trucks lean further, which brings the wheel into the deck earlier in the lean arc. If you prefer a softer, more floaty feel and ride bigger wheels, risers let you keep that setup without the bite.
- You drop into ledges or bowls regularly. Even if your street setup is borderline, adding a little clearance makes deep drops and steep transitions safer and more predictable.
- You feel your board is “clippy” or you are hesitating on hard carves. If you find yourself soft-pedaling your carves because you are worried the wheel will hit, that is a signal the clearance is marginal.
The Quick Sizing Rule
As a starting point: 50-53mm wheels on 8.0″+ deck = no risers needed. 54-55mm wheels on 7.75-8.0″ deck = 1/8″ risers. 56mm+ wheels or any setup with soft bushings and big wheels = 1/4″ risers. These are starting points, not gospel — your exact deck width, truck model, and bushing durometer will shift the number by a millimeter or two, so test and adjust.
How to Choose the Right Riser Pad Size
Riser pads come in two standard thicknesses: 1/8 inch (about 3mm) and 1/4 inch (about 6mm). Some brands also make a 3/16″ option, but 1/8″ and 1/4″ cover the vast majority of street and park setups. The choice between them comes down to how much clearance you need, not to a universal rule.
Here is the sizing reference I use when I build test boards. It assumes a standard street setup with medium-durometer bushings (around 90-93A). Soft bushings shift you toward the bigger riser; hard bushings let you get away with the smaller one.
| Wheel Size | Deck Width | Bushing | Recommended Riser |
|---|---|---|---|
| 50-52mm | 8.0″-8.25″ | Medium (90-93A) | None |
| 53-54mm | 7.75″-8.0″ | Medium | 1/8″ (3mm) |
| 55-56mm | 7.75″-8.0″ | Medium | 1/8″ (3mm) |
| 56mm+ | 7.5″-8.0″ | Soft (78A-90A) | 1/4″ (6mm) |
| 58-60mm | 8.0″-8.25″ | Soft-Medium | 1/4″ (6mm) |
Reference starting points from my test-board builds. Your exact truck model and bushing durometer will shift the recommendation by a millimeter or two.
The single most important variable is the combination of wheel size and deck width. Bigger wheels on a narrower board is the worst case, because you have both the increased wheel diameter and the reduced lean room working against you. That is where 1/4″ risers earn their keep. If you are somewhere in the middle — say 54mm wheels on an 8.0″ board — 1/8″ is usually the right call, and you can always add a second set later if you find you need more clearance.
If you are unsure, start with 1/8″. They are cheap, and it is easier to add a second layer than to deal with the taller, more flexy board that comes from starting at 1/4″ when you only needed 1/8″.
How Riser Pads Change the Feel of Your Board
Adding risers is not a neutral change. It lifts your axles, and that changes how the board responds in a few specific ways. Understanding these trade-offs is what separates a good riser decision from a bad one.
Stability goes up
The main reason people add risers — beyond fixing wheel bite — is that the taller axle makes the board more stable at speed. With the wheels lifted off the deck, the trucks can lean a little further before the wheel hits, which gives you a slightly wider stable platform. On a hard push or a deep carve, the board feels more planted. This is especially noticeable if you run big wheels for comfort or speed, like 56mm or 58mm.
Flex increases
Riser pads are made of polyurethane, which is slightly softer than the hard plastic or aluminum of the truck hanger and the maple of the deck. Stacking a soft disc between the truck and the deck adds a small amount of flex to the whole stack. On a 1/8″ riser the effect is subtle. On a 1/4″ riser, or if you stack two, you will notice the board feels a little more “bouncy” and less locked-in. For most street riders this is fine, but if you are a flip-heavy rider who wants maximum pop response, that added flex is a small cost.
Flip tricks are slightly harder
Because the board is a fraction of a millimeter taller and has a little more flex in the stack, the pop-to-catch window on flip tricks gets a tiny bit tighter. In practice, for a 1/8″ riser the difference is negligible — most riders will not notice. If you are stacking 1/4″ risers or two of them, the effect becomes a little more real, and you may need a moment to re-adjust your pop timing. It is not a deal-breaker, but it is worth knowing if flips are your bread and butter.
Board height and ground clearance
Adding risers raises the deck a few millimeters off the ground. This is a good thing in one specific way: you gain a little more clearance for nose and tail hits on small obstacles. It is a small gain, but on technical lines with lots of tiny gaps and curbs, it can matter. On the flip side, the taller board has a slightly higher center of gravity, which is a minor factor in balance but not something most riders will feel.
Bottom Line on Feel
For most street and park riders, the stability gain from risers outweighs the small increase in flex. If you ride 54mm+ wheels and your board is clipping, risers will make the board feel better, not worse. The flip-trick penalty is real but minor at 1/8″ and only worth worrying about if you are stacking 1/4″ and ride flip-heavy.
Riser Pad Materials: Polyurethane vs Plastic
Most riser pads on the market are made from one of two materials, and the difference matters more than the price tag suggests.
Polyurethane (PU) risers
The standard choice. PU risers are slightly flexible, which means they absorb a small amount of impact and add a touch of the “soft” flex we covered earlier. They are durable, cheap, and come in the 1/8″ and 1/4″ sizes everyone expects. If you are buying risers for a normal street setup, this is what you want. The slight flex actually helps them seat flat against the deck and truck baseplate, which keeps the stack stable over time.
Hard plastic risers
Less common, and usually aimed at riders who want to keep the stack as stiff as possible. Hard plastic adds essentially no flex, so the board feels closer to a riser-less setup. The trade-off is that they transmit more vibration and are a little more likely to rattle or shift if they are not perfectly flat. For flip-heavy riders who want maximum pop response, hard plastic is the way to go. For everyone else, PU is the better default.
One thing to avoid: cheap “shim” risers that are just thin cardboard or foam. These compress, warp, and fall apart within a few weeks. If a riser is not molded polyurethane or hard plastic, it is not a real riser — it is a temporary fix that will leave you with a wobbly board.
How to Install Riser Pads (Step by Step)
Installing risers takes about 15 minutes and one T-tool. Here is the full process, in order.
- Loosen all eight truck bolts. You do not need to remove the trucks entirely — just back each bolt out enough that the truck can lift. Use the T-tool to turn each bolt a quarter to half turn. Loosen the front and back trucks on both sides.
- Slide the riser pads under each hanger. Lift each truck just enough to slip the pad in between the truck baseplate and the deck. The hole in the pad should line up with the two mounting bolt holes on that truck. Do this for all four trucks (two front, two back). Use the same thickness on the front and back so the board stays level.
- Re-tighten the bolts evenly. Bring each bolt down in a crisscross pattern — top-left, bottom-right, top-right, bottom-left — rather than tightening one corner fully before moving on. Even tightening keeps the truck square and prevents it from shifting under load.
- Check that the truck sits flat. With the board on the ground, look at each truck from the side. The baseplate should sit evenly on top of the riser, with no visible gap or tilt. If a truck rocks, the riser may be the wrong diameter or the bolt may not be fully seated — re-check.
- Test for clearance. Lean each truck to full lean by hand and confirm the wheel clears the deck with room to spare. If it still touches, you need a thicker riser or you have stacked them wrong.
- Take a short ride and re-check the bolts. PU risers can settle slightly during the first few sessions. After a day or two, re-tighten the bolts once more to make sure nothing has loosened.
Pro Tip
Match the riser thickness front and back. An uneven stack (1/8″ in front, 1/4″ in back) makes the board sit at a slight angle, which changes your stance height and can feel off in a way that is hard to diagnose. Keep both ends the same thickness unless you have a specific reason not to.
Common Riser Pad Mistakes to Avoid
After testing a lot of setups with risers, these are the mistakes I see most often — and the ones that turn a good fix into a frustrating one.
Buying the wrong thickness
The most common error. People default to 1/4″ because “bigger is safer,” but 1/4″ on a setup that only needs 1/8″ adds unnecessary height and flex. Start with the smallest riser that gives you clearance and work up only if needed.
Mixing thicknesses front and back
Stacking a 1/8″ in the front and a 1/4″ in the back tilts the board. You will feel it as a subtle stance-height imbalance that you cannot quite name. Keep both ends the same.
Using risers that are the wrong diameter
Each truck model has a specific baseplate bolt spacing. A riser that is too small will not cover the mounting area and will flex under load. A riser that is too large may not seat flat. Check the riser diameter against your truck before you install, not after.
Stacking two 1/4″ risers
Some riders stack two 1/4″ pads (12mm total) to gain maximum clearance. This works, but it makes the board very tall and flexy, and it noticeably changes how the board flips and carves. Only do this if you genuinely need that much clearance, and accept that the board feel will change significantly.
Skipping the re-tighten after settling
PU risers compress a little during the first sessions. If you do not re-check the bolts after a day or two, the trucks can loosen and start to shift, which introduces a wobble that feels like a bad truck when the real problem is a loose bolt over a compressed riser.
Maintenance: How Long Do Riser Pads Last?
Riser pads are one of the most durable parts of a skateboard, but they are not immortal. Polyurethane risers will last a long time — often a year or more of regular riding — before they start to show wear. Here is what to watch for.
- Compression set. Over time, PU can permanently compress, especially under heavy impact. If your risers look visibly thinner or squished compared to a fresh pair, they have lost their original height and you are losing clearance.
- Cracking or delamination. A hairline crack or a layer separating is a sign the pad is failing. Replace it before it breaks mid-ride.
- Edge wear. The outer edge of the riser can wear down where it contacts the deck. If the edge is rounded off significantly, the riser no longer seats flat.
As a rule of thumb, inspect your risers whenever you re-tape your deck or replace your bearings. If they look compressed, cracked, or worn, replace them — they are cheap, and a failing riser is a wobbly board and, at worst, a broken setup. Most riders replace risers every 12-18 months of regular street use, but a heavy park rider on soft bushings may need to replace them sooner.
When to Replace
Replace your risers if they are visibly compressed, cracked, or delaminated, or if you have lost the clearance they were added to create. A $5-$12 set is a small cost compared to the time you waste diagnosing a wobbly board that is really just a tired riser.
Riser Pads vs the Other Wheel Bite Fixes
Riser pads are not the only way to stop wheel bite, and understanding how they compare helps you pick the right fix for your situation. Here are the four main options and when each one wins.
| Fix | How It Works | Best For | Trade-Off |
|---|---|---|---|
| Riser Pads | Lift the axle to create clearance | Keeping your current deck + big wheels | Adds slight flex and height |
| Harder Bushings | Reduce truck lean so the wheel hits later | Riders who already run soft bushings | Stiffer, less floaty feel; less forgiveness |
| Bigger Deck | Move the trucks out so wheels have more room | Riders who are upgrading decks anyway | New deck cost; changes stance width |
| Smaller Wheels | Reduce wheel diameter so it clears | Riders who want a lighter, faster setup | Less cushion, more vibration, less speed retention |
Riser pads are the only fix that lets you keep your existing deck, wheels, and bushings — which is why they are the most popular option for riders who just want to add bigger wheels to a board they already like.
For most riders who are happy with their deck and want to move to 54mm+ wheels, riser pads are the obvious choice because they are the cheapest and most reversible fix. If you are already thinking about a new deck, a wider board may be the better long-term move. If you run very soft bushings and hate the floaty feel, harder bushings may solve the bite without adding height.
Best Riser Pads in 2026
Riser pads are a commodity product — the performance difference between brands is small, and the right choice comes down more to thickness, material, and price than to the logo. That said, a few brands make consistently good risers that are easy to find. Here are the ones I recommend, with price ranges and where to get them. (These are informational picks — ska8 does not run affiliate links, so buy from the retailer that has them in stock.)
Independent Riser Pads (1/8″ and 1/4″)
The most widely available option. Independent is the truck brand that most street skaters already run, and their risers match their baseplates perfectly. Durable polyurethane, consistent thickness, and easy to find at any local skate shop. Price: about $8-$10 for a set of eight (enough for both trucks). Available at most skate shops and major online retailers.
Thrasher Riser Pads
Another strong commodity option, slightly cheaper than Independent and just as durable. If your trucks are not Independent, Thrasher risers still fit the standard bolt pattern. Price: about $6-$9 for a set of eight. Widely available.
Bones Riser Pads
Bones (the wheels and bearings company) makes a clean, no-frills riser that is a little stiffer than the typical PU option. Good for riders who want a touch less flex. Price: about $7-$10 for a set of eight. Available at skate shops and online.
Hard Plastic Riser Pads
For flip-heavy riders who want the minimum flex, a few brands make hard plastic risers in 1/8″ and 1/4″. These are less common and a little pricier, but they keep the stack stiff. Price: about $10-$14 for a set of eight. Look for them at specialty skate shops.
My Default Recommendation
If you are unsure, buy a set of Independent 1/8″ risers (about $8-$10). They fit the most common trucks, they are durable, and if you find you need more clearance you can add a second set. Total cost to cover both trucks: under $12. It is one of the cheapest upgrades that actually makes your board feel better.
Frequently Asked Questions About Riser Pads
Do riser pads make your board slower?
Not in any meaningful way. Riser pads add a few millimeters of height and a small amount of flex, but they do not add weight or drag that affects speed. If anything, by preventing wheel bite they let you ride faster and carve deeper without the board pinning. Any speed difference between a risered and non-risered board is imperceptible.
Can I use riser pads on a bowl or park board?
Yes, and a lot of bowl and park riders do, especially if they run bigger wheels. The same sizing logic applies — match the riser thickness to your wheel size and deck width. In the bowl, the extra stability from a taller axle can actually help on steep transitions, where you want a more planted feel.
How many riser pads do I need?
You need one per truck, so a set of four covers a standard skateboard. Most sets sold in stores come with eight (two per truck) so you have spares. A standard set of four is all you need for one board.
Will riser pads fix a board that already feels wobbly?
Probably not — and if your board already feels wobbly, adding risers could make it worse. A wobbly board is usually a sign of worn bushings, a loose or damaged truck, or a warped deck, not a clearance problem. Fix the root cause first, then add risers if you still have wheel bite. Riser pads solve clearance, not wear.
Are riser pads the same as wheel spacers or axle spacers?
No. Riser pads go under the truck, between the truck and the deck, to raise the axle. Wheel or axle spacers go between the wheel and the axle nut, which is a different job (usually for fine-tuning wheel position or preventing wheel rub in a different way). Do not confuse the two — if you want to fix wheel bite, you need riser pads, not axle spacers.
See Also
If you are working on your setup, these guides go deeper on the pieces that work together with your risers:
- Skateboard Bushings 2026: Complete Setup & Buyer Guide — bushing durometer is the other half of the wheel-bite equation.
- Best Skateboard Trucks in 2026 — Complete Buyer Guide — truck width and geometry affect how much clearance you need.
- Skateboard Wheels 2026: Size, Durometer & Profile Guide — wheel size is the main driver of whether you need risers at all.
- How to Manual on a Skateboard: Step-by-Step Guide 2026 — extra clearance makes deep manuals more forgiving.
Sources
This guide draws on my own test-board builds and the following references for truck geometry, wheel sizing, and setup conventions:
- Independent Truck Company — truck geometry and baseplate specifications.
- Bones Wheels — wheel sizing and durometer reference.
- The Berrics — street setup conventions and wheel-bite guidance.
#RiserPads #SkateboardSetup #Skateboarding2026 #WheelBite #SkateTrucks #SkateWheels #SkateboardBuild #SkateGear #StreetSkating #SkateboardMaintenance #SkateTips #SkateboardTuning #RiserPads2026 #SkateboardRig #SkateboardingGuide #SkateShop
This guide is part of the ska8 daily series. Explore more below.