
Published: September 03, 2026
Nothing changes how a truck turns like a bushing. Swap one worn cone for a stiffer one and a setup that felt mushy suddenly locks in. Swap in a softer barrel and the same trucks carve through a pool coping like they were built for it. Bushings are the smallest, cheapest part of a skateboard, and the most underrated. They sit between the baseplate and the hanger, and they decide how much the truck leans, how fast it turns, and how stable the board feels at speed.
In this guide, I break down every bushing shape, durometer, and setup choice you will actually encounter on a board in 2026, and I walk you through swapping them step by step. After seven years testing boards for this site, I have gone through more bushing sets than I can count, and I will tell you exactly what works, what is a waste of money, and how to dial in a setup that matches how you ride. Whether you are riding street ledges, hitting a local park, or carving a big bowl, you will leave here knowing which bushings to put on your trucks and how to adjust them until the board feels right.
By Mia Torres, Skate Gear Reviewer
Mia has spent 7 years testing skateboards and protective gear, covering everything from beginner setups to advanced street rigs.
What Are Skateboard Bushings?
Bushings are the urethane rubber components that sit inside your skateboard trucks. They are the part you feel when you lean the board. There is a pair on each truck, and together the four bushings control how the hanger rotates around the baseplate. When you push off and turn, your body weight compresses the bushings, the hanger pivots, and the wheels angle. Stiffer bushings resist that motion, keeping the board straight and stable. Softer bushings compress easily, letting the truck turn faster with less effort.
Every bushing set you buy is a deliberate trade-off. Manufacturers shape and harden urethane in specific ways to target a riding style. A soft, wide bushing gives you a loose, carving feel for bowls and downhill. A stiff, narrow cone gives you a locked-in, responsive feel for street and technical tricks. Getting the right combination is not about finding the single hardest or softest part; it is about matching the bushing to your weight, your truck size, and the terrain you actually ride most.
Quick fact
A standard street skateboard carries four bushings total, one pair per truck. That is why bushings are so affordable. A full set for two trucks typically costs less than a single pair of wheels, which is why most riders replace them on the same schedule as their bearings and wheels.
Bushings also take a beating. They are the only part of the truck that is in constant contact with the baseplate and the hanger, so they wear, flatten, and harden over time. A bushing that feels fine on the day you install it can feel dead and unresponsive months later. Knowing how to read that wear and when to replace it is half the skill of keeping a board fast, and it is covered later in this guide.
The Two Main Bushing Shapes: Cones vs Barrels
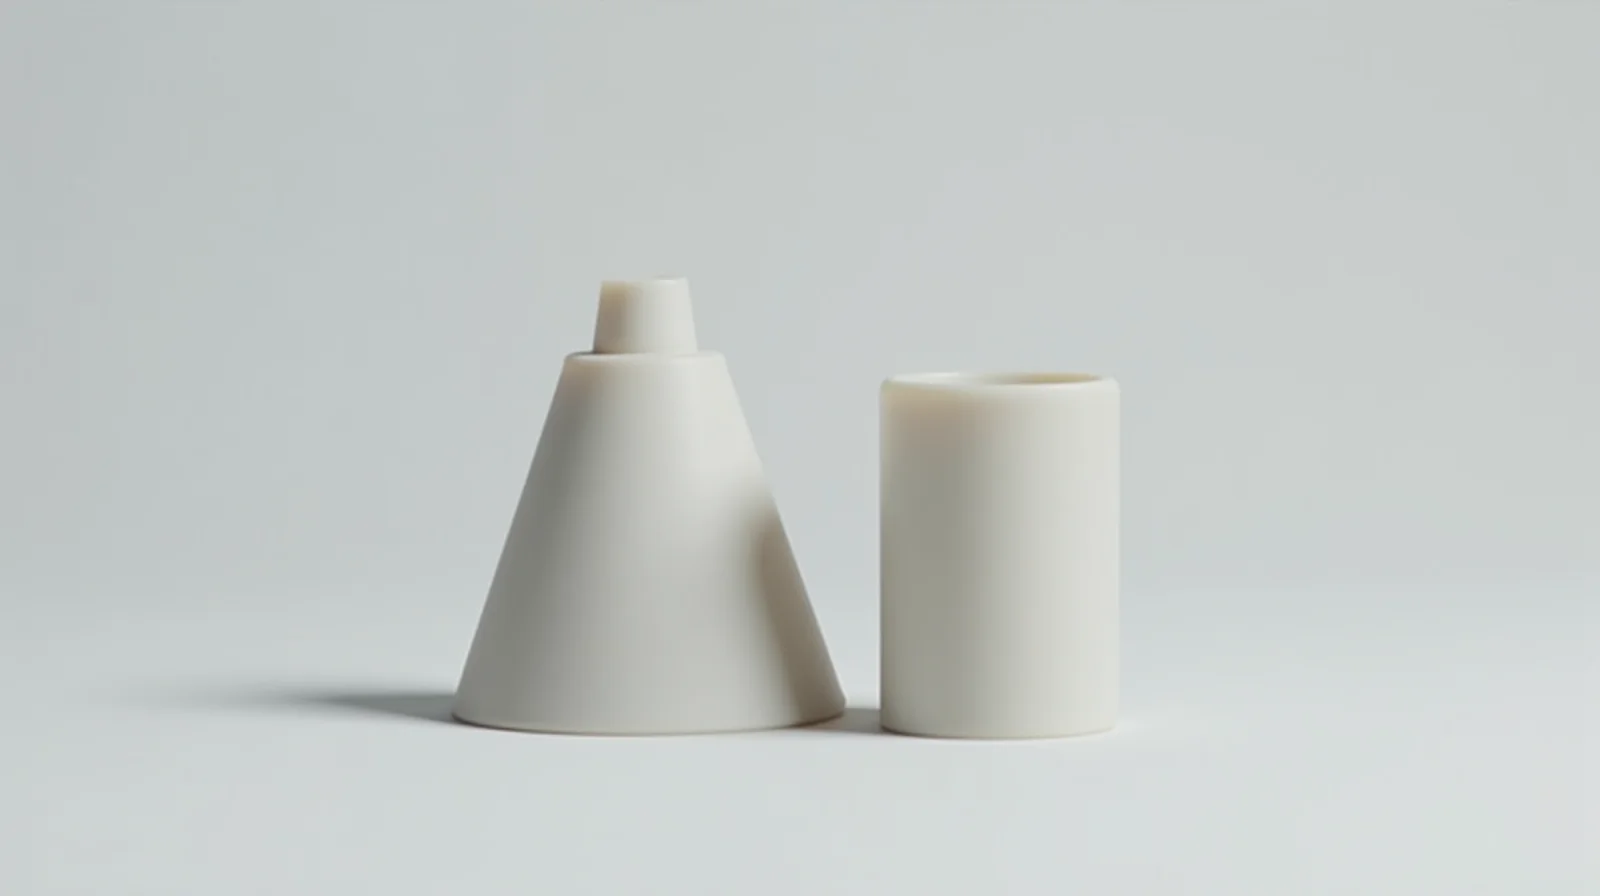
Almost every bushing you will buy falls into one of two shapes: the cone and the barrel. The shape matters as much as the hardness, because it changes how the bushing compresses under load and how the truck responds when you lean.
Cones are tapered, wider on the outside and narrower toward the center. That taper is what makes them the standard for street riding. As the cone compresses, the widening baseplate surface resists the hanger, giving you a progressive, predictable turn. Cones lock in at the bottom of their travel, which is exactly what you want for ollies, grinds, and technical lines where you need the board to stay planted and snap back straight. Most stock street trucks ship with cone bushings for this reason.
Barrels are more cylindrical, with a rounded cross-section that does not taper as aggressively. They compress more evenly and roll through their travel, which makes them looser and more responsive in the middle of a turn. Barrels are the go-to choice for bowls, parks, and downhill, where you want the truck to carve through a big radius without feeling locked up. A lot of riders who do a lot of pool coping run barrels in the baseplate position to get that smooth, flowing turn while keeping a stiffer cone up in the hanger for control.
Pro tip
Many experienced riders mix shapes on purpose. A soft barrel in the baseplate slot plus a stiff cone in the hanger slot gives you a loose initial turn that snaps back into stability. That hybrid setup is one of the most versatile combinations you can build, and it is the reason mixed-bushing packs are so popular among park riders.
There is a third, less common shape worth knowing: the cone with a cut or notched profile, sometimes called a flanged or cut cone. These add a slight step in the travel, which some riders like because it creates a more defined bite point. They are not worth chasing unless you have a specific reason, but you will see them in higher-end packs, so do not mistake them for a defect.
| Feature | Cone Bushing | Barrel Bushing |
|---|---|---|
| Shape | Tapered, wide outer to narrow inner | Rounded, near-cylindrical |
| Turn feel | Progressive, locks in at travel end | Even, looser mid-travel carve |
| Best for | Street, technical, tricks | Bowls, park, downhill |
| Stability at speed | High | Moderate to high |
| Typical position | Hanger slot (top) | Baseplate slot (bottom) |
Reference based on standard urethane bushing geometry used across major truck manufacturers in 2026.
Bushings Durometer: How Hard Is Too Hard?
Hardness is measured on the Shore O durometer scale, the same scale used for skateboard wheels, grip tape, and most urethane products. For bushings, you will almost always see numbers between about 45A and 100A. The lower the number, the softer and more responsive the bushing; the higher the number, the stiffer and more stable.
There is no single correct durometer. It is a function of three variables: your body weight, your truck size, and how you ride. A 135-pound rider and a 180-pound rider on the exact same trucks will need different bushing hardness to get the same turn. Heavier riders push the urethane through its travel faster, so they need stiffer bushings to prevent the truck from bottoming out and feeling sloppy. Lighter riders need softer bushings so they can actually compress them and turn the board.
Truck size matters too. A larger 150 to 160 millimeter truck has a longer hanger and more leverage, so it already turns more easily. Pair a big truck with a soft bushing and the board can feel floaty and hard to control. A smaller 139 to 144 millimeter street truck turns less naturally, so it pairs well with a softer bushing to open up the turn.
From testing, the single biggest mistake I see from beginners is going too stiff. A setup that is too hard feels locked and dead, and it punishes every small correction. If your board feels like it is fighting you and you are constantly fighting the trucks to turn, your bushings are almost certainly too hard, not too soft. Ease down in durometer before you reach for anything else.
Rule of thumb
Start with the truck manufacturer recommended durometer for your weight class, then adjust one step at a time. If you want a looser, more carving feel, drop one durometer step. If you want more stability and a tighter, more responsive turn, go one step stiffer. Change one variable, ride it for a session, then decide.
| Durometer | Feel | Best for | Rider weight |
|---|---|---|---|
| 45A to 60A | Very loose, deep carve | Downhill, big bowl | Light, under 120 lb |
| 60A to 78A | Loose to medium | Park, transition, cruising | Light to average |
| 78A to 90A | Medium, balanced | All-round street and park | Average, 120 to 160 lb |
| 90A to 100A | Stiff, locked in | Street, technical, speed | Heavier, over 160 lb |
General ranges. Exact numbers vary by brand, so always check the manufacturer recommended durometer for your specific truck.
Baseplate vs Hanger Bushing: Top and Bottom Slots
Each truck holds two bushings in two slots: the baseplate bushing sits at the bottom, between the baseplate and the lower part of the hanger, and the hanger bushing sits at the top, between the top of the hanger and the baseplate. These two slots do not do the same job, and you can load them with different bushings on purpose.
The baseplate bushing, at the bottom, controls the initial, looser part of the turn. It is the one that compresses first as you start to lean, so a softer bushing here gives you a quick, responsive entry into the turn. The hanger bushing, at the top, controls the end of the travel and how the truck snaps back. A stiffer bushing here adds stability and keeps the truck from bottoming out, which is why most street setups run a softer bushing at the bottom and a stiffer one at the top.
This split is not a gimmick; it is how you get a board that turns fast out of the gate but stays stable at the end of the lean. If both slots have the same bushing, the setup feels more one-note, either too loose through the whole turn or too stiff through the whole turn. Once you start mixing hardness between the two slots, you unlock a lot more control and it is one of the most effective upgrades you can make without replacing your trucks.
A word on the kingpin. The kingpin is the threaded bolt that holds the hanger to the baseplate and it works together with the bushings. The kingpin nut, or axle nut on the hanger side, sets how much the bushings can compress. Loosen it and the turn gets looser; tighten it and the turn gets stiffer. Bushings and the kingpin nut work as a team, so when you are dialing in your setup, adjust the nut first, get close, and then change bushings to fine-tune.
How the nut works
The axle nut on the hanger side is the tuning tool. Turn it out (counter-clockwise) to loosen the bushing and get a more responsive turn. Turn it in (clockwise) to tighten the bushing and get a stiffer, more stable turn. Most riders live within about a quarter to half a turn of the nut for fine adjustment, and it is worth getting a proper axle nut or a small wrench rather than fumbling with coins.
How to Swap Bushings: Step-by-Step
Swapping bushings is one of the easiest upgrades on a skateboard and you can do it in about fifteen minutes with a single tool. You do not need to remove the wheels to change the baseplate or hanger bushings on most trucks, but having the truck off the board makes it far easier to work on.
- Remove the truck from the board. Flip the board upside down and remove the two kingpin nuts with your axle nut wrench or a small wrench. Lift the truck off the bushing stack and set it aside. If your truck is stubborn, a light tap with a mallet on the baseplate usually frees it.
- Pop out the old bushings. With the truck off, the baseplate bushing and hanger bushing sit in their slots around the kingpin. Use your fingers or a small flat tool to press them out. They are held only by friction, so a firm push in the right direction releases each one.
- Check the bushing slots. Before installing new bushings, look inside each slot for flat spots, cracks, or worn ridges. A worn slot can make even a new bushing feel loose. If a slot is badly worn, consider replacing the truck rather than fighting it.
- Install the new bushings. Seat the baseplate bushing in the bottom slot first, then the hanger bushing in the top slot. Make sure each one sits flush and does not sit proud of the slot, which would prevent the truck from seating properly.
- Reassemble the truck. Place the truck back on the board, insert the kingpin through the hanger and baseplate, and thread on the kingpin nuts. Tighten them evenly, then adjust the axle nut to your preferred turn stiffness.
- Ride and dial in. Do a few push-offs and small turns. If the board feels too stiff, back the axle nut out a quarter turn. If it feels too loose or wobbly, tighten the nut a quarter turn. Make small changes and ride between each one.
The whole process is reversible and cheap, which is exactly what makes bushings so easy to experiment with. I keep a small kit of different durometers and shapes in my bag specifically so I can test a new setup on the same session. It takes a few minutes to swap, and it is the fastest way to learn how your board likes to feel.
Choosing Bushings by Riding Style
Once you understand shape and durometer, picking the right bushing comes down to matching them to how you actually ride. Here is how I would set up each common discipline, based on what I have seen work across sessions.
Street and technical skating. You want stability, a locked-in feel, and fast snap-back. Run cones in both slots, medium to stiff durometer, with the top bushing one step stiffer than the bottom. This keeps the board planted through grinds and manuals and gives you the tight, responsive turn you need for tight lines. If you are heavier or ride fast, push toward the stiffer end of the range.
Park and transition skating. You want a looser, more flowing turn that can carve through bowls and hit coping. A common setup is a softer barrel in the baseplate slot and a medium cone in the hanger slot. That gives you a responsive entry into the turn and stability at the end so the truck does not bottom out when you drop deep into a transition section.
Downhill and speed skating. Stability is everything. Run stiff cones, often both slots, at the higher end of the durometer scale. You want the trucks to resist turning so the board tracks straight at speed. Many downhill riders also use risers and stiffer bushings together to keep the setup predictable when the pace picks up.
Beginner and all-round. Do not overthink it. Start with the stock bushings that came with your trucks, set the axle nut to a comfortable turn, and ride. If you find yourself constantly fighting the board, ease the nut out or drop to a slightly softer bushing. Most beginners benefit from a medium, all-around setup before chasing a specialized one.
Common mistake
Copying a pro setup you saw online without matching it to your weight, truck size, and riding style. A bushing combination that works for a 170-pound downhill rider will feel wrong on a 120-pound street skater. Use the pro setup as a starting point, then adjust to your body and your terrain. The right setup is the one that makes your board feel natural, not the one that matches a screenshot.
Troubleshooting and When to Replace Bushings
Bushings wear, and when they do the board feels different in a way that is easy to misdiagnose. Here is how to read the symptoms and know when a new set is the fix rather than a new truck or a new wheel setup.
The board feels loose or wobbly at speed. This usually means the bushings have flattened and can no longer resist the hanger. The truck bottoms out and the board feels unstable. Tighten the axle nut first; if that does not help, the bushings are likely worn and a stiffer or newer set will restore stability.
The board feels dead or hard to turn. The opposite problem. The bushings have hardened with age and no longer compress. Urethane stiffens over time as it breaks down, so a set that turned fine a year ago can feel locked now. A newer, slightly softer set brings the turn back.
The truck feels loose or there is play in the hanger. This is not the bushing, it is the hardware. Check that the kingpin nuts and axle nut are snug and that the bushing slots are not worn. A bushing can only compensate so much; if there is real play in the truck, the bushing is not the fix.
The turn feels uneven between the two trucks. One bushing may be worn more than the other, or one slot is worn. Swap the front and rear truck and ride again; if the uneven feel moves with the truck, the problem is in that truck or its bushings.
How often should you replace bushings? There is no fixed schedule, but most riders go through a set every six months to a year of regular riding. Harder riders, downhill skaters, and anyone who rides rough street surfaces will go through them faster. If the board starts feeling off, the bushings are the cheapest and fastest thing to try, which is why I keep a spare set on hand. A fresh set of bushings can make a truck that felt tired feel brand new.
Bottom line
Bushings are the fastest, cheapest way to change how your board feels. If the turn is not right, try the axle nut first, then swap the bushing shape or durometer. Because the parts are inexpensive, the cost of experimenting is low and the payoff is a board that feels tuned to the way you ride.
Materials and Brands: What to Actually Buy
Bushings are made from urethane, the same material as skateboard wheels, and the quality of that urethane determines how a bushing wears and how it feels over time. Higher-quality urethane holds its shape longer, resists hardening, and does not flatten out as quickly as budget urethane. You can usually tell the difference within a few weeks of riding, where a cheap set starts to feel dead and a good set still turns the way it did on day one.
Most major truck manufacturers sell their own branded bushing sets that are matched to their truck geometry. That is the safest starting point because the durometer and shape are designed to work with that specific truck. Independent bushing brands have also grown, and they are worth considering if you want a specific durometer or shape that your truck manufacturer does not offer in their own line. The trade-off with an independent brand is that you have to be a little more careful matching the size to your truck, so if you are new to this, stay with the manufacturer recommended set.
Price is not a reliable indicator of quality in bushings. A set that costs a few dollars more can last twice as long, and because bushings are cheap to begin with, paying a little more for a set that lasts a year instead of three months is usually the better value. My advice is to buy one quality set for your primary board and keep a spare set for when the first one wears, rather than buying several cheap sets that you replace constantly.
Where to find them is straightforward. Most skate shops carry a range of bushing sets in different durometers, and online retailers stock the major brands. You do not need to buy a whole truck to change your bushings, and that is one of the things that makes this one of the most cost-effective upgrades available. A set of four bushings, enough for two trucks, is one of the smallest investments you can make for the biggest change in how the board feels.
Buyer note
Check the durometer and shape on the packaging before you buy, not just the brand name. Two sets from the same brand can have very different hardness. Match the durometer to your weight class and the shape to your riding style, and buy from a retailer that stocks the full range so you can fine-tune later without hunting for a specific size.
Beginner Bushing Buying Guide
If you are new to this and overwhelmed by the options, here is a simple path that will get you a good setup without a lot of guesswork. Start with the bushings that came with your trucks, because they are already matched to the truck geometry and to a reasonable durometer for general riding. Ride them for a couple of weeks and pay attention to how the board feels when you turn.
If the board feels too stiff and you are working hard to turn, you need softer bushings. Drop to the next durometer down and keep the same shape. If the board feels too loose and wobbly, especially at speed, you need stiffer bushings. Go one durometer up. Make one change at a time and ride between changes, so you can actually feel what each adjustment did.
Once you have the durometer right, think about shape. If you mostly ride street and technical terrain, cones are the right choice. If you spend a lot of time in a bowl or park, barrels will give you a looser, more flowing turn. If you are not sure yet, cones are the safer default for most riders, and you can always experiment with barrels later.
Keep a simple checklist in mind when you shop. Check the durometer against your weight class. Check the shape against your riding style. Make sure the size matches your truck, either by using the manufacturer recommended set or by confirming the independent set is compatible. And keep a spare set on hand, because when your current set wears you will want to be able to swap them without waiting for a new delivery. A few minutes of setup can put you back on the board the same day.
Quick checklist
Match durometer to your weight, match shape to your riding style, confirm the size fits your truck, and keep a spare set ready. Change one variable at a time, ride it for a session, and only move to the next change once you can feel what the last one did. That disciplined approach is what separates a setup that feels random from one that feels dialed in.
How to Care for Your Bushings
Bushings do not need much maintenance, but a little care goes a long way toward making them last. The single most important habit is to keep them clean. Urethane picks up grit, dust, and small debris from the street and the park, and that grit works its way into the bushing and the slot, accelerating wear and making the truck feel rough.
Every few weeks, remove the truck and give the bushings a quick rinse with water and a little mild soap, then let them air dry completely before putting them back. Do not use harsh solvents or put them in a dryer, because heat and aggressive chemicals can break down the urethane and change the durometer. A simple wash and a full dry is all they need.
While the truck is off, inspect the bushing slots and the baseplate for any signs of wear or cracking. A small crack in a slot can let a bushing shift out of place, which changes the turn and can make the truck feel loose. Catching that early means you can address it before it becomes a bigger problem. And keep the axle nut and kingpin nuts snug, because a loose truck puts uneven pressure on the bushings and speeds up wear.
Storage matters more than most riders think. Leave your board in the car on a hot day and the urethane can take a beating, hardening and changing character. Store your board out of direct sun and away from extreme heat, and the bushings will hold their durometer for much longer. It is the same reason your wheels and grip tape last longer when the board is kept in a reasonable environment.
Taken together, these habits mean your bushings keep their feel for a lot longer, and you can ride with confidence that the board will turn the way you expect. It is a small amount of attention for a part that makes a big difference to how the board feels every session.
Frequently Asked Questions
How often should I replace my skateboard bushings?
Most riders replace bushings every six months to a year of regular riding, but it depends on how hard you ride. The real signal is how the board feels. If the turn has changed, gotten looser, or gone stiff and dead, that is your cue to swap them. Downhill skaters and street riders on rough surfaces usually go through sets faster.
Do I need to remove the wheels to change bushings?
Usually no. On most trucks you can change the baseplate and hanger bushings with the truck off the board but the wheels still on. Removing the truck from the board makes it much easier to work, but you generally do not need to strip the wheels off. A full strip is only needed if you are replacing the whole truck or cleaning the axle.
Can I mix different durometers on the same truck?
Yes, and it is a common and effective technique. Putting a softer bushing in the baseplate slot and a stiffer one in the hanger slot gives you a responsive entry into the turn and stability at the end. Many riders tune their setup this way to get exactly the feel they want. Just change one variable at a time so you can feel the effect of each change.
Are harder bushings always better for speed?
Not always. Stiffer bushings add stability at speed, which is why downhill and speed riders often run them, but too stiff a setup can feel locked and punish every correction. The right hardness depends on your weight, your truck size, and how you ride. For most street and park riders, a medium to medium-stiff setup is the most versatile, and you should only go stiffer if you actually need the extra stability.
What durometer should a beginner start with?
Start with the bushings that came with your trucks, because they are already matched to the truck and to a reasonable durometer for general riding. If the board feels too stiff, drop one durometer step; if it feels too loose, go one step stiffer. Cones are a safe default shape for most beginners, and you can experiment with barrels later if you spend more time in a park or bowl.
Conclusion: Dial In the Setup That Feels Like Yours
Bushings are the smallest part of your skateboard and one of the most powerful. They decide how the board turns, how stable it feels at speed, and how much effort every correction takes. Once you understand the two main shapes, cones and barrels, and how durometer maps to your weight and riding style, picking the right setup becomes a lot less guesswork.
Start with what came on your trucks, adjust the axle nut first, and then fine-tune the bushing shape and hardness one change at a time. Mix a softer baseplate bushing with a stiffer hanger bushing if you want a setup that turns fast out of the gate but stays stable at the end. Keep the parts clean, store the board out of the heat, and swap the set when the board starts to feel off. It is one of the cheapest and most effective upgrades you can make, and the difference between a board that feels random and one that feels tuned to the way you ride is often nothing more than the right pair of bushings.
Keep reading
If you are still setting up the rest of your board, our guides on choosing skateboard trucks, picking skateboard wheels, and building your first skateboard walk through the other parts that work together with your bushings. And if you are new to the safety side, our essential safety gear guide covers the protection worth having before you ride.
Sources
Indy Trucks — truck geometry and bushing specifications.
The Berrics — skateboarding technique and setup references.
Wikipedia: Skateboard — standard skateboard component reference.
#Skateboarding #SkateboardBushings #TruckSetup #SkateboardTrucks #SkateboardWheels #SkateboardGears #SkateGear #StreetSkating #ParkSkating #SkateboardSetup #Durometer #ConeBushings #BarrelBushings #SkateboardMaintenance #SkateboardingTips #SkateboardBeginner #SkateLife #SkateboardRig
This guide is part of the ska8 daily series. Explore more below.