
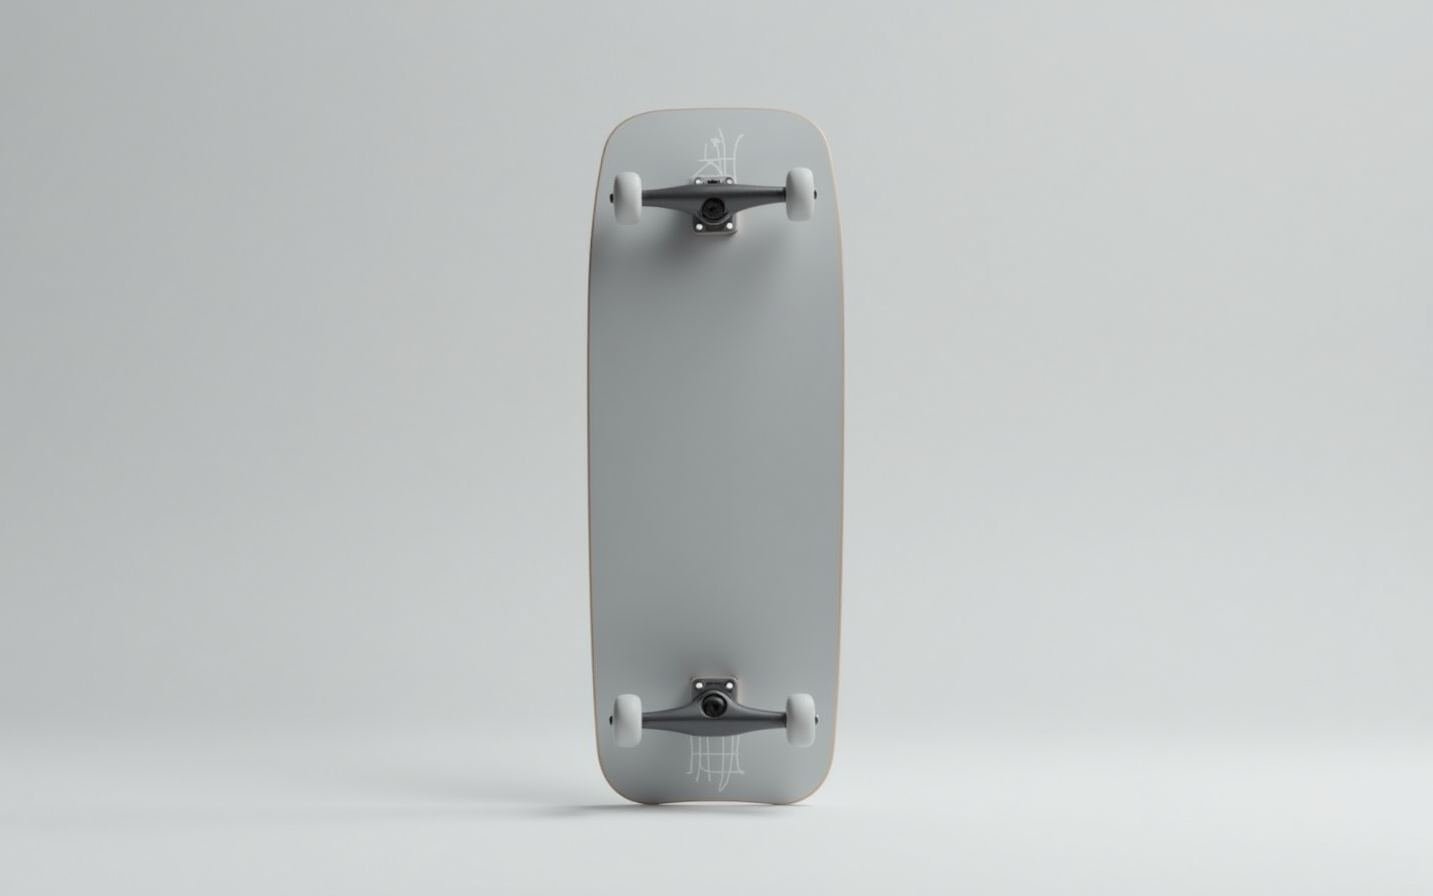
A skateboard arrives in your door either as a complete board or as a box of separate parts. If it is a complete, the setup is done for you. If it is a bag of pieces — deck, two trucks, four wheels, a hardware kit, and a roll of grip tape — then assembling your skateboard is the first real job you will do as a skater, and it is the one that most beginners quietly dread because the instructions are thin and the stakes feel higher than they are. After building and rebuilding hundreds of boards over seven years of testing gear, I can tell you that a skateboard is one of the simplest machines in the sport to put together correctly, and a single well-charged session of assembly is the difference between a setup that turns clean on day one and one that creaks, drags, and feels dead for the first month.
This guide walks through how to assemble a skateboard from a full parts kit, start to finish: what every component does, the tools you actually need, the four assembly steps in the exact order they should be done, and the setup differences between street, park, and cruising. It also covers the mistakes I see most often in a first build — the truck mounted backwards, the kingpin set too stiff, the axle bolts over-tightened — and how to check your work before you roll out. Everything below is based on the boards and trucks I have mounted by hand, so the tolerances and feel descriptions are the ones you will actually get in your own hands, not a diagram.
By Mia Torres, Skate Gear Reviewer
Mia has spent 7 years testing skateboards and protective gear, covering everything from beginner setups to advanced street rigs.
Published: October 12, 2026
The Full Parts List: What a Skateboard Is Made Of
Before you touch a screw, lay everything out and confirm you have the complete set. A standard skateboard has eight functional groups: the deck, two trucks, four wheels, four bearing pairs (one per wheel), the hardware kit, a sheet of grip tape, and the spacers or riser pads that sit between the wheels and the deck. Most complete boards come with all of these, but a parts kit or a wheel-and-bushing swap will change what is in the box, so a quick inventory against the table below saves you from discovering a missing washer twenty minutes into the build.
| Component | Quantity | What it does |
|---|---|---|
| Deck | 1 | The 7-ply maple (or composite) platform you stand on; concave shape gives toe control |
| Trucks | 2 | The T-shaped metal assemblies (baseplate, hanger, kingpin, bushings) that hold the wheels and let the board turn |
| Wheels | 4 | The polyurethane rollers; size and durometer set your speed, grip, and slide behavior |
| Bearings | 8 (4 pairs) | The sealed steel rollers inside each wheel that let it spin freely |
| Hardware kit | 1 | Deck screws, nuts, axle bolts, axle nuts, kingpin nut, washers, and spacers |
| Grip tape | 1 sheet | The abrasive sandpaper-like surface that holds your feet in place |
| Riser pads (optional) | 2 | Thin plastic shims between deck and truck that add clearance to stop wheel bite |
Reference counts for a standard 8.0–8.5 inch street board. Cruiser and longboard builds use more wheels (6 to 8) and sometimes two trucks per axle, so count your own hardware before starting.
The one check that saves every first build
Before you mount anything, confirm both trucks are the same size and both wheels are the same diameter and durometer. Mixing a 52mm wheel with a 54mm wheel, or two different truck widths on one deck, is the fastest way to end up with a board that turns differently left from right. A two-minute visual match prevents the most common assembly regret.
Tools You Need to Assemble a Skateboard
You do not need a workshop to assemble a skateboard. Two tools cover ninety percent of the job, and a third makes it faster. A T-tool (a small three-way or four-way wrench) is the only thing you truly need for a complete build — it reaches the axle nuts, the kingpin castle nut, and the deck hardware in one tool. A flathead screwdriver handles the occasional stubborn kingpin nut or a wheel that is sitting on top of a bearing. And a dedicated axle wrench is a quality-of-life upgrade once you are bolting wheels on and off often.
| Tool | Use in the build | Typical price | Notes |
|---|---|---|---|
| T-tool | Deck screws, axle nuts, kingpin nut | $10–$20 | The essential; most hardware kits include one |
| Flathead screwdriver | Stubborn kingpin nut, bearing press | $5–$10 | Any medium flathead works |
| Axle wrench | Faster wheel install/remove | $8–$15 | Optional upgrade once you swap wheels often |
| Cutting mat / edge | Trimming grip tape to deck outline | $5–$10 | A utility knife or scissors also work |
Prices are street-level 2026 ranges for a standard tool set, not a recommendation to buy any specific brand.
Step 1: Mount the Trucks to the Deck
Start with the deck, base-side up on a stable surface. A truck has two distinct faces: the baseplate, which is flat and bolted to the deck, and the hanger, the T-shaped part that holds the axle. The baseplate always sits on the deck and the hanger always points down toward the ground. The single most common first-build mistake is flipping a truck around, and the fix is simple: the kingpin — the threaded bolt with the castle nut — should always point toward the side of the board you will stand with your front foot on, or, for a standard setup, toward the center of the board. For a regular stance, mount both trucks so the hanger points the same way; the direction of the hanger relative to the deck sets whether your setup is regular or goofy, but for assembly it only matters that both trucks face the same direction and are centered.
Center each truck along the deck so the hanger sits at the same distance from the nose as the other hanger sits from the tail. Most decks have four pre-drilled mounting holes per truck, spaced to fit a standard truck baseplate. Line up the baseplate holes with the deck holes, drop in the four deck screws, and hand-tighten them all the way first. Hand-tightening every screw before you apply torque is the step that prevents a warped or cracked deck — if one screw is fully tightened while the others are still loose, you can clamp the truck at a slight angle and put uneven stress on the plywood. Once all eight screws are snug by hand, finish tightening with the T-tool in a star pattern (opposite corners, then the next pair) so the clamp force distributes evenly.
Pro tip: mark your truck position before you commit
Use a pencil to trace the baseplate outline on the deck before you remove anything. If you later want to move the trucks (to change your stance length or to fit a wider truck), the marks show you exactly where the holes are, and you can drill new holes with confidence instead of guessing. It takes twenty seconds and saves a lot of deck damage.
Step 2: Set the Kingpin and Bushing Stiffness
The kingpin is the single most important setup adjustment on the whole board, and it is the one beginners almost always set wrong. The kingpin bolt screws through the baseplate and hanger, and its length, locked by the castle nut, determines how much the bushings are compressed. More compression means a stiffer, tighter turning response; less compression means softer, looser turning. The factory setting is usually fine as a starting point, but you will almost always want to adjust it after your first session, so learn the adjustment now.
To adjust, loosen the castle nut and turn the kingpin bolt with your T-tool or a flathead. Turning it to the right (clockwise as you look at the baseplate) pushes the hanger down and compresses the bushings, making the board turn less. Turning it to the left opens the hanger and makes the board turn more. As you adjust, hold the deck and try to turn the hanger by hand: you want enough resistance that the board does not turn on its own when you shift your weight, but not so much that it feels locked. For street skating, a medium-stiff setting is the safe default — stable for ollies and grinds, still able to turn when you commit. For cruising and carving, open it up a full turn or more so the board flows through turns. The full bushing-to-kingpin pairing logic, including how to read what you have, is covered in our [bushings guide](https://ska8.com/skateboard-bushings-2026-complete-setup-buyer-guide/).
Warning: the kingpin too stiff is the #1 “my board feels dead” cause
If a freshly assembled board feels like it will not turn no matter how hard you lean, the kingpin is almost certainly over-compressed. Back it out a quarter to a half turn and retest. The opposite problem — a hanger that wobbles and turns freely with no resistance — means the castle nut is too loose or the bushings are missing or worn. Check that both bushings are actually installed in their slots before you blame the setting.
Step 3: Install the Bearings and Wheels
Each wheel takes two bearings, one on each side, pressed into the molded bearing seats. Most new wheels arrive with the bearings already installed; if yours do not, press them in with your thumb or the flat end of a screwdriver — bearings are a slip fit and should slide in with moderate pressure, never forced with a hammer, which can damage the seal. Slide the wheel onto the axle from the side where the axle bolt is accessible, then thread the axle bolt on by hand. Add the axle nut and tighten with the T-tool until the wheel spins freely with no side-to-side play. A wheel should rotate smoothly for a few seconds after a flick, with zero wobble and no rubbing against the deck or hanger.
The spacers go between each wheel and the hanger. A spacer is a short metal or plastic tube that sits on the axle between the wheel and the hanger face, keeping the wheel clear of the deck so it cannot bite into the wood when you carve hard. If your hardware kit includes spacers, put one on each side of each wheel; if it does not and your wheels sit close to the deck, that is a sign you may want to add riser pads in the next step. The difference between a bearing set that spins clean and one that drags is almost always whether the bearings were seated correctly and whether the axle nut is even — over-tightening one side loads the bearing and creates drag that you will feel as heat and a slowing wheel. The bearing spec details, including ABEC ratings and the colored seals, are in our [bearings guide](https://ska8.com/skateboard-bearings-2026-abec-colors-setup-guide/).
The wheel-spin test
After all four wheels are on, lift the board and spin each wheel. A good bearing set will spin for ten to fifteen seconds or more. If a wheel stops almost immediately, the axle nut is too tight, the bearings are dirty or mis-seated, or the wheel is rubbing the deck. Fix the drag now, not after you have ridden and generated heat in a bad bearing.
Step 4: Apply the Grip Tape
Grip tape is the last step and the one with the least room for error, so do it in a clean, dust-free area. Peel the backing off the adhesive side and start applying from the center of the deck, working outward toward the nose and tail in one smooth pass to avoid trapping air bubbles. Press firmly with your palm as you go. Once it is laid down, let it set for a minute or two, then trim the excess to the deck outline with a utility knife or scissors, following the curve of the nose and tail. Cut the tape flush to the edge but do not cut into the deck — leave a hair of tape wrapping the edge so the grip surface is continuous under your feet.
A fresh sheet of grip tape is abrasive and can scratch skin, so wear a short sleeve or work carefully. If a bubble appears, you can prick it with a pin and press the air out, but the cleanest result is to apply slowly and keep the surface smooth. After trimming, the top of the board is done and ready to ride. The grain size, sizing, and how to fit a sheet to a specific deck width is covered in our [grip tape guide](https://ska8.com/skateboard-grip-tape-2026-complete-guide/).
Street vs Park vs Cruise: How the Setup Changes
The four assembly steps are identical for every board. What changes after you assemble it is how you set the kingpin, which wheels and risers you use, and whether you add spacers at all. The same physical build is tuned very differently depending on whether you are skating flat street, a concrete park, or cruising on pavement. The table below is the tuning I reach for in each discipline, based on the boards I have run in each setting.
| Setting | Kingpin / bushing | Wheels | Riser / clearance |
|---|---|---|---|
| Flat street | Medium-stiff, stable for ollies and grinds | 50–54mm, 99a, grippy for flat tricks | Spacers; add risers if wheels are 54mm+ |
| Park / transition | Stiffer for predictable carving in the bowls | 54–56mm, 99a–101a, smoother at speed | Riser pads common to clear bigger wheels |
| Cruising | Looser, softer for easy flow through turns | 56–70mm, 78a–85a, bigger and softer | Riser pads for the larger wheel diameter |
Starting points, not rules. Durometer and size are the two biggest levers; the full wheel selection logic is in our [wheels guide](https://ska8.com/skateboard-wheels-2026-durometer-size-setup-guide/).
The Five Most Common First-Build Mistakes
After watching a lot of first assemblies, the same five errors come up again and again, and each one has a fix. None of them ruin a board, but each one makes the setup feel wrong for the first week of skating, which is exactly when a beginner decides whether skating is worth the effort.
- Truck mounted backwards or flipped. The baseplate must sit flat on the deck and both hangers must point the same way. If one truck is rotated 180 degrees, the board turns unevenly and the stance length is wrong. Flip it and re-tighten.
- Kingpin set too stiff. The most common cause of a board that feels dead and will not turn. Back the kingpin out a quarter to a half turn until the hanger has some give under hand pressure.
- Axle nuts over-tightened. Too tight loads the bearings and creates drag and heat. Tighten until the wheel spins free with no side play, then stop.
- Missing or reversed spacers. Without spacers (or with the wrong size), the wheel can contact the deck and bite. Check that each wheel has a spacer on each side and clears the deck by a few millimeters.
- Grip tape applied backwards. The adhesive side goes down against the deck and the gritty side faces up. Applying it upside down leaves a smooth, slippery surface that peels within a week.
The final check before your first roll
With the board assembled, do a two-minute walkaround: every deck screw snug, both hangers turning with equal resistance, each wheel spinning free with no wobble, and the grip tape flush and clean. Then stand on it in your normal stance and lean side to side. If the board turns the way you expect and nothing creaks, you are ready to ride. If something feels off, you know exactly where to look.
Assembling a Skateboard: FAQ
How long does it take to assemble a skateboard?
A complete first build takes most people twenty to forty minutes once the hardware is laid out. The truck mounting and wheel installation are the quick parts; the time goes into setting the kingpin stiffness correctly and trimming the grip tape to the deck outline. Do it once, learn the feel, and subsequent builds or wheel swaps take ten minutes or less.
Do I need to replace the bearings when I assemble a new board?
No, not on a new board. Factory bearings are sealed and clean, and swapping them on first assembly only adds work and a chance to mis-seat one. Replace or service bearings only when the wheels start to drag, feel gritty, or produce heat — which usually happens months after first assembly, and the cleaning routine is in our [bearings guide](https://ska8.com/skateboard-bearings-2026-abec-colors-setup-guide/).
Can I assemble a skateboard without the included T-tool?
You can, but it is not ideal. A correctly sized open-end or box wrench of the same diameter will work in a pinch, and a flathead handles the kingpin nut. The problem with improvising is that a tool that does not match the fastener size tends to strip the nut under torque, which then leaves you with a rounded, unusable fastener. If the T-tool is missing from the kit, grab a properly sized wrench before you start rather than forcing a close fit.
What is the right kingpin tightness for a beginner?
Start at the factory setting, then adjust until the hanger turns with moderate resistance by hand — firm enough that the board does not pivot when you simply shift your weight, soft enough that it still turns when you commit a lean. For street skating that usually lands in the medium-stiff range. If the board feels locked, back it out; if it feels loose and wobbly, tighten it a quarter turn and retest.
Do I need riser pads on a brand new board?
Only if your wheels are large enough to approach the deck. With standard 50–54mm street wheels and the spacers that ship in the kit, most boards have plenty of clearance and do not need risers. Add riser pads when you move to larger wheels (56mm and up), when you want more pop clearance, or when you notice the wheel grinding the deck in hard turns. The sizing and fit logic is in our [riser pads guide](https://ska8.com/skateboard-riser-pads-2026-sizing-fit-setup-guide/).
Sources
- Indy Trucks — truck, kingpin, and hardware specifications from a major US street truck manufacturer.
- Rider Skateboards — deck and complete-assembly reference from a US street board brand.
- Skateboarder Magazine — equipment, setup, and maintenance coverage from a long-running skate trade publication.
See Also
- Best Skateboard Trucks in 2026: Complete Buyer Guide — which trucks to mount on the deck.
- Skateboard Bushings 2026: Complete Setup and Buyer Guide — the bushing-and-kingpin pairing that sets your turning.
- Skateboard Wheels 2026: Durometer, Size and Setup Guide — picking the right wheel for your setup.
- Skateboard Screws 2026: Sizes, Torque and Tightening Guide — keeping the hardware you just installed tight.
- Essential Safety Gear for Skateboarding 2026 — what to wear for your first session on the new build.
#Skateboarding #SkateboardAssembly #SkateboardSetup #HowToAssemble #SkateboardBuilding #SkateboardTrucks #SkateboardWheels #SkateboardBearings #Kingpin #GripTape #StreetSkating #BeginnerSkater #SkateboardParts #Skateboard2026 #SkateGear
This guide is part of the ska8 daily series. Explore more below.