
Published: September 12, 2026
Walk into any skate park on a Saturday and you will see the same story playing out: a skater pops a new trick, the board slips, and three people are suddenly helping them up off the pavement. Skateboarding is a sport where gravity is the opponent, and skateboard injuries are far more predictable than most people expect. You do not have to collect them. After seven years of testing protective gear and watching thousands of sessions, I can tell you that the difference between skaters who ride for decades and skaters who quit after one bad week is not luck or pain tolerance. It is injury prevention: a small set of habits around gear, technique, session management, and recovery that most riders skip.
In this guide, you will learn how to prevent skateboard injuries the same way sports physiotherapists and professional skaters approach the sport — by understanding which injuries dominate skateboarding, what actually causes them, and the specific techniques that stop them before they happen. By the end, you will have a 10-step session checklist you can run before every ride, a red-flag list for knowing when to stop skating, and a return-to-skating protocol that keeps you out of the repeat-injury cycle.
By Mia Torres, Skate Gear Reviewer
Mia has spent 7 years testing skateboards and protective gear, covering everything from beginner setups to advanced street rigs.
Why Skateboarders Get Injured (and What the Data Says)
Most skateboard injuries are not the result of one catastrophic moment. They are the accumulated product of riding with a setup that is too loose, a body that is under-conditioned for the load, and a session that ran ten minutes too long. When researchers have looked at skateboarding injuries in hospital and emergency department data, the pattern is remarkably consistent: wrist and hand injuries are the most common across nearly every age group, followed by ankle sprains, knee contusions, and — the most dangerous category — head injuries. The overwhelming majority occur in skaters under 19 who ride without protective gear, and the overwhelming majority happen in the last third of a session, when fatigue is degrading the reactions and the technique.
That last detail matters more than the gear discussion. The same ledge that you have cleared twenty times becomes dangerous at minute sixty-five, because your timing has drifted, your knees are heavy, and you are no longer watching the landing — you are thinking about landing it. Injury prevention is therefore equal parts equipment and session management. The wrist guard does nothing if you ride a ledge you are not ready for, and the best session in the world goes wrong if your trucks are a full turn too loose.
What the research shows
Across orthopedic and sports medicine studies, wrist and hand injuries lead the injury distribution in skateboarding, head injuries are the leading cause of serious harm, and most injuries cluster in young riders who do not wear protective equipment. The practical takeaway: the two highest-leverage prevention moves are wearing the right gear and managing session fatigue — both are entirely under your control.
The 6 Injuries Every Skateboarder Gets (and How to Stop Them)
Not every injury deserves its own prevention routine. Six account for the vast majority of time off the board: wrist extension injuries, ankle sprains, knee trauma, head injury, shoulder problems, and back strain. Here is what causes each one and the single most effective countermeasure.
| Injury | Most common when | What causes it | Best prevention |
|---|---|---|---|
| Wrist fracture / extension injury | Any hard fall | Landing on an outstretched, locked hand with force loaded straight down the arm | Hard-shell wrist guard plus a rolling fall technique — never brace on a straight arm |
| Ankle sprain | Curb strikes, ledge landings | The board twists under a locked ankle — usually trucks that are too loose for the terrain | Truck tension matched to terrain, both feet planted on landing, ankle mobility work |
| Knee contusion / laceration | Popping off curbs, flat-ground bails | Direct impact between the kneecap and the ground or a curb edge | Hard-shell knee pads for street; land with bent knees to absorb the load |
| Head injury / concussion | Big falls, direct head strikes | Impact at speed without a certified helmet — the most serious injury category in the sport | ASTM F1492 skate helmet every session while learning; never attempt a ledge you cannot bail safely |
| Shoulder injury | Pushing off, arm-over ledge bails | Repetitive single-arm pushing plus sudden impact when you fall over your arm | Push with both hands, build scapular strength, cut sessions short when fatigued |
| Back strain | Long sessions, heavy landings | Repetitive hyperextension on landings with an under-trained core | Core work two to three times a week; land through the knees, not the lumbar spine |
Compiled from orthopedic and sports medicine literature (PubMed/NIH) and seven years of gear testing.
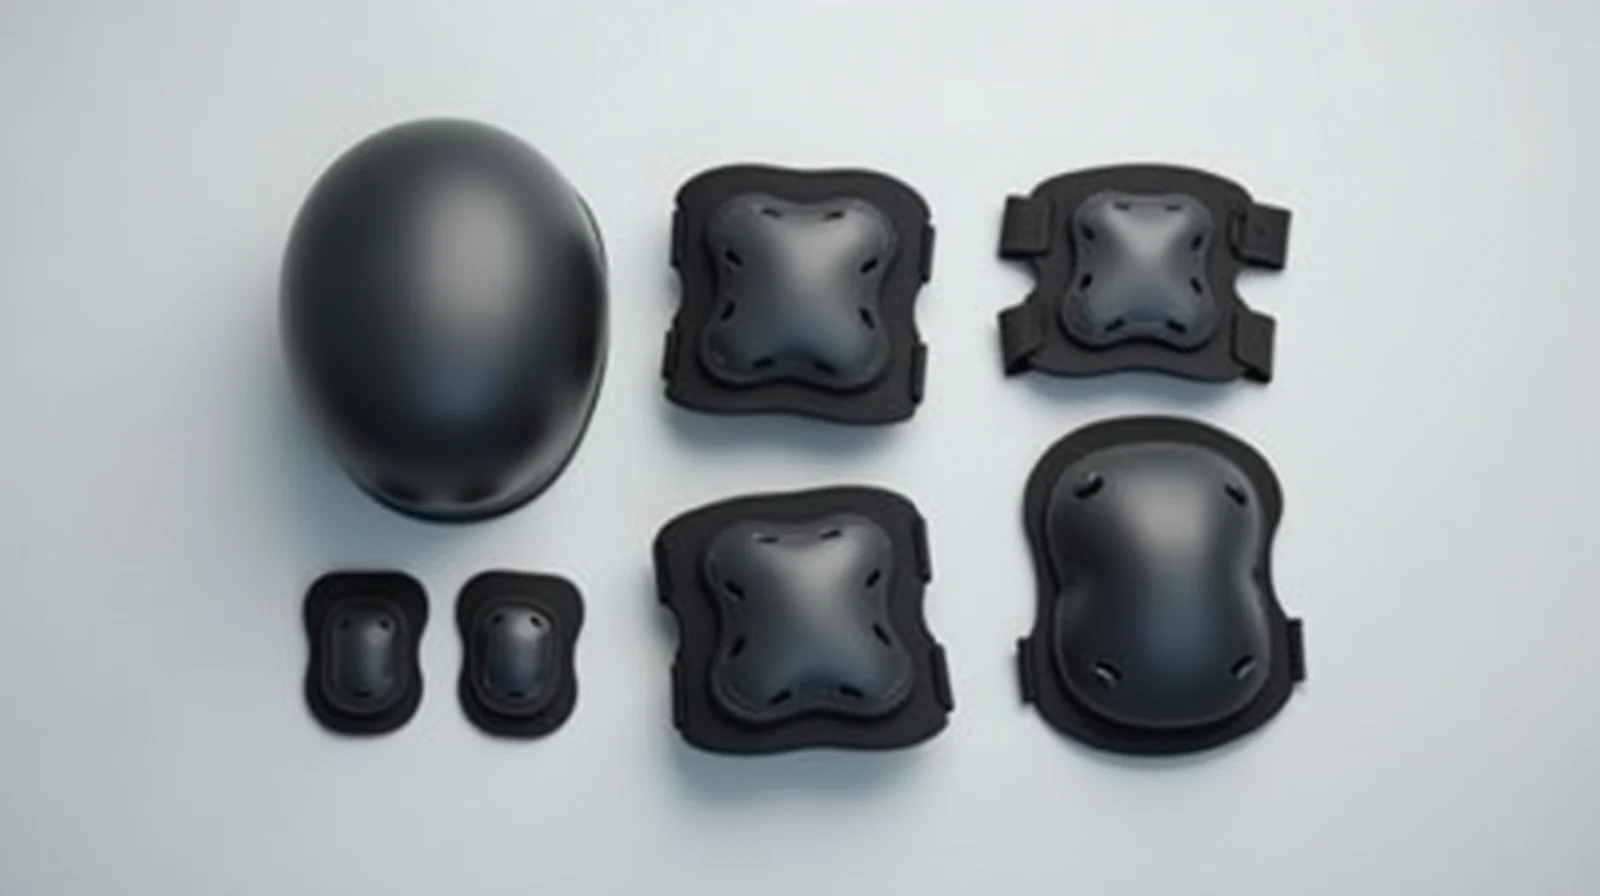
The Gear That Actually Prevents Injuries (What to Buy and Why)
Protective gear is the single most effective injury-prevention tool in skateboarding, and the research is blunt about it: riders who wear the right gear are far less likely to be hospitalized for the same fall. The catch is that the market is full of gear that looks protective but is not — soft foam knee pads that flatten into a pancake, wrist “wraps” that bend at the wrong angle, and cheap helmets that crack on the first real impact. Here is how to tell real protection from fashion.
Helmets: the non-negotiable
A helmet is the only piece of gear that prevents the injuries that end careers and lives. Buy a helmet certified to the ASTM F1492 standard — that is the skate-specific standard, distinct from the cycling standard, and it is what every serious skate helmet (from a proper brand you can verify on its spec page) carries. Fit matters as much as certification: the helmet should sit level, not tipped back, and the retention strap should form a triangle under each ear with one finger of slack. A helmet that you have to pull down over your brow is too big and will ride up on impact, defeating its purpose. I have tested more than a dozen helmets over the years, and the difference between a helmet that stays put and one that shifts is the difference between a scraped chin and a concussion.
Wrist guards: the highest-value piece for street
Wrist guards are the most cost-effective injury-prevention purchase in the sport, and the best ones share a specific design: a hard plastic or composite shell that keeps your wrist from hyperextending, paired with a strap system that actually holds it in place. Soft-only wrist wraps do not prevent the injury, because the injury mechanism is a hard load driving a bent wrist into extension. When I test wrist guards, I look for a rigid dorsal shell, a palm-side pad that does not peel away on impact, and a strap that secures the forearm — not just the wrist. Pair a good wrist guard with a rolling fall technique and the wrist stops being the injury that ends your session.
Knee and elbow pads for street skating
Street skating is where the knees take the punishment. Hard-shell knee pads with a rounded impact plate are what you want, because a flat foam pad concentrates the load on your kneecap instead of spreading it. Elbow pads matter less for the knee-first fall but protect the elbow on the side-fall. For beginners and anyone learning a new trick, I treat full pads as standard equipment, not optional. As your skill and bail technique improve you can lighten up, but the knee is the one joint that is hard to rehab once the cartilage is damaged.
Pro tip
Fit is what makes gear work. A too-big helmet rides up, a too-loose wrist guard peels off on impact, and pads that are two sizes too large shift on a fall. Try gear on, put it in a fall position, and confirm it stays put before you buy it. The best gear that does not fit you is the same as no gear at all.
Technique: How You Land Determines How You Get Hurt
Gear only works if your technique lets it do its job. Most skateboarding injuries are really landing injuries: the body meets the ground in a way that concentrates force on one joint. Fixing the way you land is the highest-leverage technique change in the sport.
Land with bent knees, every single time
The single most important landing habit is to bend your knees as you come down. A straight-legged landing drives the full force of the fall straight into your ankles, knees, and spine. A bent-knee landing lets your muscles and the natural shock-absorption of your legs take the hit, cutting the peak force dramatically. From my coaching experience, the skaters who land the hardest are almost always the ones who land the straightest. Make “soft knees” a conscious cue on every landing until it is automatic.
Keep your eyes on the landing, not on the trick
Injuries spike in the moment you stop looking at the ground. When you are focused on the trick, you are not reading the landing — and a landing you have not read is a landing you are likely to bail. Keep your vision moving forward to the spot you will land. This sounds obvious, but it is the habit that separates clean landings from bails at the exact moment a fall would have been avoidable.
Learn to bail on purpose
The best skaters do not just land tricks, they bail them. A controlled bail — where you choose to let the board go rather than grab it — turns a high-speed crash into a low-speed slide. Before you attempt a new ledge or a bigger gap, ask yourself how you will bail it. If you cannot picture the bail, you are not ready for the trick. Bailing on purpose is the most underrated injury-prevention skill in skateboarding, and it costs nothing to practice.
Push and pop with control, not with everything you have
Over-popping a trick is a common injury mechanism: the board leaves your feet harder than your body can follow, and you land off-balance. Control your pop. A slightly smaller, cleaner pop that you can land is always better than a bigger pop you bail. This applies to pushing too — a fast, loose push-off on uneven ground is a fast way to a wrist or ankle injury.
Setup and Board Maintenance: The Invisible Injury Factor
A lot of injuries are really setup problems. A board that is out of tune changes how it responds in the worst possible moments — on the landing, in the turn, on the strike. Five setup habits keep you safe:
- Truck tension matched to terrain. Loose trucks feel free on flat ground but turn too fast for curbs and ledges — a strike that a tighter setup would have ridden over becomes a slide-out and a wrist injury. Tighten your trucks before street sessions; the difference of a quarter turn is the difference between a clean strike and a bail. Our trucks buyer guide covers the full tension and bushing picture.
- Torqued-down hardware. A loose axle nut can let a truck shift mid-landing. Check your hardware at the start of every session — a loose truck is the most common mechanical cause of a surprise bail.
- Wheels you can feel. Worn, flat-spotting wheels change your line on every turn. If a wheel has a flat spot you can feel with your thumb, it is past its life. Our wheels guide breaks down durometer and profile for street vs. park.
- Grip that actually grips. Worn grip tape is a bail machine. When your feet start sliding on the board before you want them to, re-tape — it is a fifteen-minute job that prevents more injuries than any other maintenance task.
- Trick height matched to bail space. This is a setup-of-ambition problem: attempt the trick that your bail space allows, not the one that looks cool. A ledge you cannot bail safely is not a ledge you ride today.
Session Management: Fatigue Is Where Injuries Live
Ask any skate physio when injuries happen and the answer is the same: late in the session. Fatigue degrades exactly the things that keep you safe — reaction time, timing, balance, and the judgment to back off a ledge that is not your day. Three rules keep the fatigue problem from becoming your injury:
1. Know your window, and respect it
Most skaters have a quality window of 45 to 90 minutes depending on age, fitness, and the tricks in play. When you notice the same trick that was clean an hour ago is now messy, your window is closing. That is your cue to slow down or end the session — not to push harder to “lock it in.” The trick you are chasing at minute seventy is the trick that ends in the ER.
2. Hydrate and fuel like it is a sport (because it is)
A two-hour skate session in the sun is a real aerobic workout. Dehydration and low blood sugar both slow reaction time and worsen cramping. Water, and a small amount of food on long sessions, are cheap insurance.
3. End with a cool-down, not a last-ditch attempt
Finish each session with a few easy push-outs and a short static stretch of the calves, hamstrings, and hip flexors. A five-minute cool-down is one of the best things you can do for the next day, and it is the step that most riders skip right before they feel the next day’s stiffness.
The 10-Point Pre-Session Injury Checklist
Run this checklist before every street session. It takes about four minutes and covers the gear, setup, and body factors that cause most injuries. Print it, tape it to your board bag, or just make it a habit.
- Helmets on, fitted. Level, not tipped back; strap forms a triangle with one finger of slack under each ear. (See our helmet fit guide for the full fitting method.)
- Wrist guards secured. Rigid dorsal shell in place, forearm strap locked.
- Pads on for street. Hard-shell knee pads at minimum for beginners and anyone learning a new trick.
- Trucks checked. Tightened for the terrain you are skating today; axle nuts torqued.
- Wheels and grip checked. No flat spots, no worn grip, no flat tire feel.
- Warm-up done. Five minutes of light jogging, dynamic leg swings, ankle circles, and a few easy push-outs before the first trick.
- Foot placement drilled. Two or three easy ollies to confirm your feet are where they need to be before you add height.
- Bail plan for the first new trick. You can picture how you will bail it. If you cannot, you are not doing it today.
- Session window set. You know how long you are skating and when you will stop, before you start.
- Water within reach. And a small snack if the session will run past an hour.
Red flags — stop skating today if any of these are true
You are already sore or injured and skating through it. You have been skating for more than an hour and your landings have gotten worse. You are angry or frustrated enough that you are pushing past your limit. You have consumed alcohol or any substance that dulls your judgment. You are at a spot with more people around than your bail space allows. Any one of these is a reason to put the board down and ride another day.
Recovery and Return-to-Skating: How to Come Back Without Re-Injury
Injury prevention does not end when you get hurt — the way you return to the board is what decides whether you get hurt again. Most repeat injuries happen because skaters return too soon, too fast, and too eager. Here is the protocol I recommend to anyone I coach who is coming back from a setback.
The graduated return protocol
Coming back is a staircase, not a light switch. Work through these stages in order, and spend at least a day (and usually two or three) at each one before moving up. If anything at a stage aggravates the injury, drop back a stage and rest.
| Stage | What you do | Progress when |
|---|---|---|
| 1. Flat push-outs only | Short, slow push-outs on flat, smooth ground. No tricks, no turns, no obstacles. | You can push for 10 minutes with zero pain or stiffness. |
| 2. Easy turns and slow ollies | Gentle carving turns plus a handful of small, clean ollies on flat ground. | Every ollie lands clean with no pain through landing. |
| 3. Your known, comfortable tricks | Tricks you could land before the injury, on familiar, low-consequence obstacles. | You land consistently and feel the old confidence returning. |
| 4. Back to full session | Normal session length and trick selection, including one controlled step up in difficulty. | You ride a full session with no next-day stiffness or pain. |
A general framework — for any serious or recurring injury, follow the specific timeline your physician or physical therapist gives you.
When to see a professional
Some injuries are not “skate through it” injuries. Get medical attention if you have any of the following: pain that does not improve after 48 hours of rest, swelling that is significant or getting worse, numbness or tingling, a joint that will not bear weight, a head strike with any confusion, dizziness, vomiting, or memory gap (seek care immediately), or any injury that keeps coming back despite modified skating. A physiotherapist who works with action sports can be worth their weight in gold for recurring ankle, knee, and wrist problems, because they fix the underlying weakness or movement pattern that keeps producing the injury.
Frequently Asked Questions About Skateboard Injury Prevention
Do I really need a helmet if I am an experienced skater?
Yes. Head injuries do not respect experience — they come from the one fall you did not see coming, and that fall is more likely to be a big one, because experienced skaters ride bigger things. The ASTM F1492-certified helmet is the cheapest insurance in the sport, and every serious skater I know wears one while learning anything new, no matter how long they have been skating.
How long after a minor injury can I skate again?
For a minor bruise or mild soreness with no swelling, most skaters can resume light skating when pain-free on foot — usually 24 to 48 hours — and then work through the graduated return protocol above. If there was significant swelling, a joint was twisted hard, or pain persists past two days of rest, see a professional before getting back on the board.
What is the best exercise to do to prevent skateboarding injuries?
There is no single magic exercise, but ankle stability work (calf raises, single-leg balance, ankle alphabet), core work (planks, dead bugs), and lateral leg strength (lateral lunges, step-downs) cover the joints that take the most punishment. Two to three short sessions per week of this work does more for your longevity than any piece of gear except a helmet.
Is it safe to skate with a sprained ankle if it does not hurt much?
Usually no. A sprain that “does not hurt much” is still an unstable joint, and landing a trick on it is exactly how a first-degree sprain becomes a second- or third-degree one. Rest it until you can hop on one foot without pain, then return through the graduated protocol with an eye on your landing mechanics.
How can I protect my kids while they learn to skateboard?
Full gear from day one — helmet, wrist guards, and knee pads — plus a flat, smooth, low-traffic area for the first weeks. Keep the first sessions short (30 to 45 minutes), focus on balance and pushing before any tricks, and never let them chase tricks they cannot bail. Most beginner injuries are not from the tricks, they are from the first month of overconfidence on curbs.
See Also
- Essential Safety Gear for Skateboarding — what to buy at every level
- How to Fall Safely on a Skateboard — the rolling fall, step by step
- Skateboard Helmet Fit 2026 — sizing and adjustment guide
Sources
- PubMed — skateboarding injury epidemiology and prevention literature (NIH)
- Sports Medicine Australia — musculoskeletal injury guidance
- American Academy of Orthopaedic Surgeons — injury and orthopedic reference
#Skateboarding #SkateboardSafety #InjuryPrevention #SkateLife #StreetSkating #WristGuard #SkateHelmet #KneePads #SkateTricks #SkateboardingTips #BeginnerSkater #SkateSession #Skateboarder #SkateboardGear #FallSafely
This guide is part of the ska8 daily series. Explore more below.