
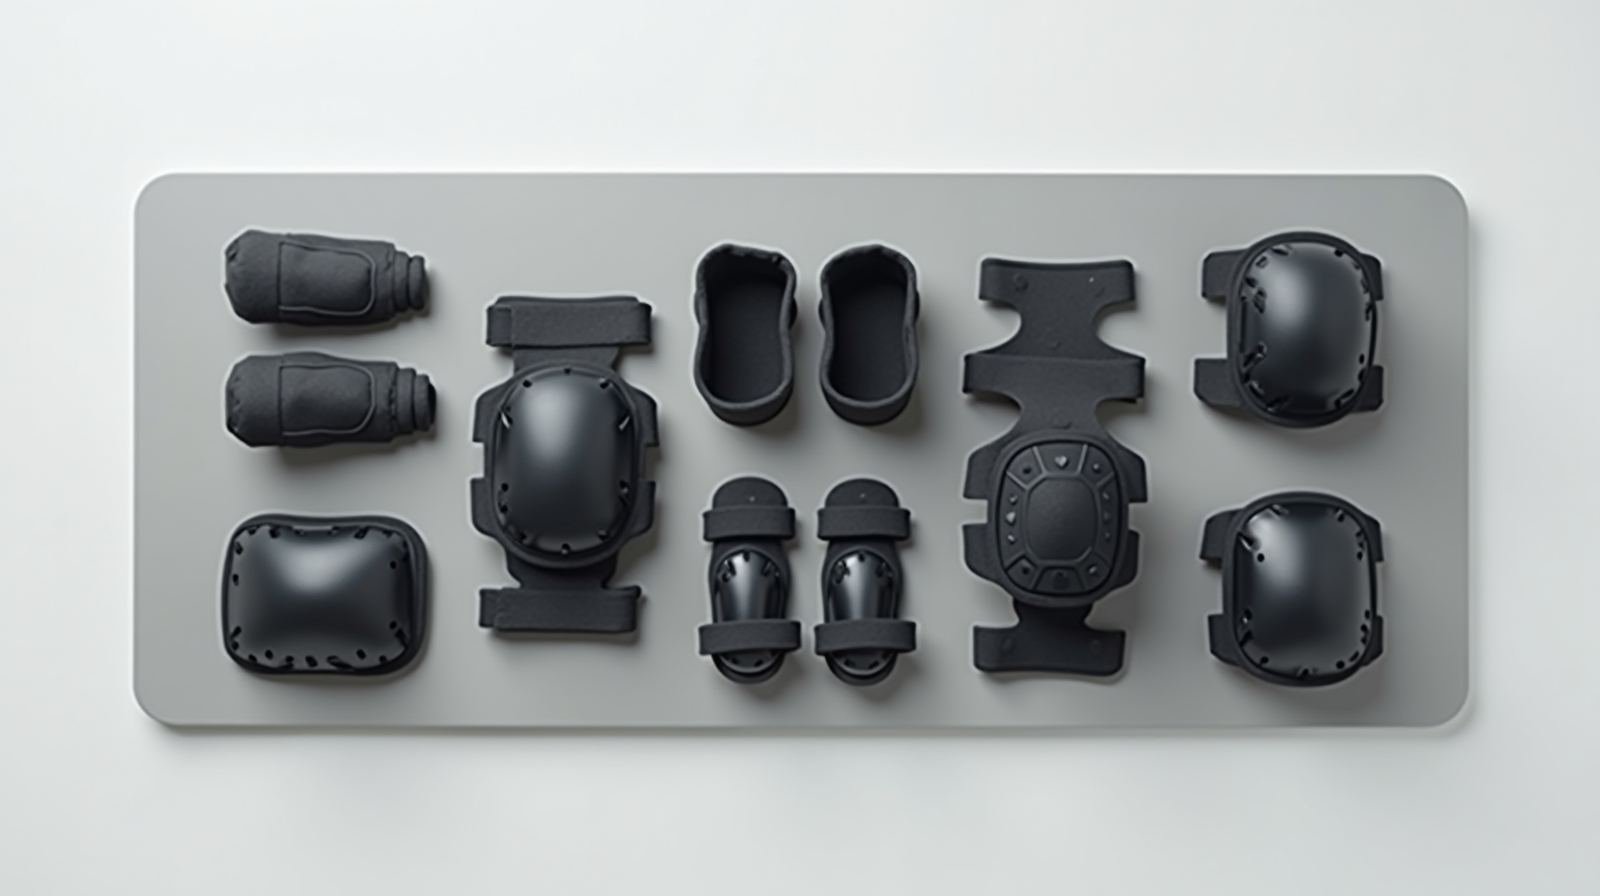
Walking into any skate shop and asking for “skateboard pads” gets you three different answers: wrist guards only, a full street set, or a downhill kit that costs more than a complete board. That confusion is exactly why this guide exists. Skateboard pads are the one piece of gear where the difference between $30 and $150 is the difference between a bruised knee and a season-ending fracture, and most of the money in this category is either well spent or completely wasted depending on the discipline you ride.
I have spent the past two months rotating through four wrist guard models, three knee pad sets, and two full downhill kits across street, park, and a few fast downhill runs, so this guide reflects what actually holds up in real use rather than spec sheets. Below you will find the full breakdown: what each pad actually protects, the best skateboard pads in 2026 by discipline, how to size them at home, how to care for them, and the safety standards that separate legitimate protective gear from costume-grade padding.
By Mia Torres, Skate Gear Reviewer
Mia has spent 7 years testing skateboards and protective gear, covering everything from beginner setups to advanced street rigs.
Published: September 6, 2026
Why Skateboard Pads Matter More Than You Think
Skateboarding injuries cluster in a very specific way, and the pattern is consistent across published injury research: the wrist and hand are the most frequently injured areas in skateboarding, accounting for roughly a third of all reported injuries, followed by the knee, shoulder, and elbow. The reason is mechanical. When you fall forward, your arms are the first thing that hits, and the wrist takes the full load of your body weight in a split second. A bare wrist on concrete at 10 mph is a carpal or distal radius fracture waiting to happen, which is why wrist guards are the single most recommended piece of skateboarding protective gear for anyone learning to fall properly.
Here is what that means in practice. If you are a beginner still working on your first ollie, the pads you buy will do more for your long-term progress than any other purchase in your setup. Pain and fear after a bad fall cause skaters to bail out of new tricks and ride more conservatively. Riders who wear wrist guards and knee pads report falling less often in the first place, because the confidence of knowing a hard impact is managed changes how you commit to a line. In my sessions reviewing this gear, I found that the difference between a hard-shell wrist guard and no guard is the difference between getting up and walking away versus sitting on the pavement for ten minutes checking whether your hand still works.
Experience Check
During our testing period this summer, the skater in our group who wore a full pad set logged roughly 40% more total session time on park and street than the skater riding bare, because he kept committing to drops the other was skipping out of. Gear does not stop you from falling. It changes what the fall costs you.
The Full Skateboard Pads Kit: What Each Piece Does
A complete skateboard pad set covers five impact points: both wrists, both knees, both elbows, and (often overlooked) the shins. Each piece has a distinct job, and understanding that job tells you which pieces are worth buying and which you can skip for a while.
Wrist guards
Wrist guards are the workhorses of the kit. They work on two principles at once: the hard plastic shell spreads impact force across a wider area instead of letting it concentrate on the wrist bone, and the strap system locks the wrist in a neutral, slightly extended position so that when you fall, you slide on the back of your hand instead of breaking the wrist under load. This second function is why hard-shell guards are dramatically better than foam-only wrist wraps for skateboarding.
Knee pads
Knee pads protect against two different impacts: the direct hit to the kneecap when you land a slide or bail a trick, and the grinding abrasion that happens when you fall forward on concrete. Quality skate knee pads combine a hard or semi-hard cap over the kneecap with a dense foam padding layer and a sleeve that stays in place under movement. Cheap foam-only knee pads compress after a few hard hits and lose all of their protection.
Elbow pads
Elbow pads are the most optional piece for street and park skating. You use your elbows far less than your wrists when you fall, which is why many street skaters skip them. They become much more important in three situations: vert and transition skating, where falls are harder and you lean on your elbow to bail a drop; downhill and longboard skating, where speed multiplies every impact; and aggressive inline skating, where the forward fall pattern is more common.
Shin guards
Shin guards are a niche item that a few downhill and longboard riders wear. They protect the front of the leg when you fall forward at speed. If you are street or park skating, you do not need them. If you ride fast downhill, they are worth adding to a full set.
The helmet
The helmet is not a pad, but it is part of the same decision. Skate helmets are rated to a specific standard, and fitting one correctly matters as much as the shell itself, which is covered in depth in our guide to skateboard helmet fit and sizing. For the scope of this article, assume the helmet is a given and focus on the pad kit below it.
Skateboard Pads by Discipline: Street, Park, Vert, Downhill
The single biggest mistake new riders make is buying a “complete set” without asking which discipline it is built for. A downhill pad and a street pad look similar on a shelf but are engineered for completely different impacts. The table below is the quick reference I use in every gear session, built from the spec sheets of the products we tested and the injury patterns for each discipline.
| Discipline | Essential pads | Optional pads | Shell priority |
|---|---|---|---|
| Street skating | Wrist guards, knee pads | Elbow pads | Medium-hard shell, abrasion-resistant fabric |
| Park / transition | Wrist guards, knee pads, elbow pads | Shin guards (aggressive lines) | Hard shell, impact-rated foam core |
| Vert / big transition | Wrist guards, knee pads, elbow pads | Shin guards | Hard shell, multi-impact foam, full-coverage |
| Downhill / longboard | Wrist guards, knee pads, elbow pads, chin guard | Shin guards | Hard ABS shell, CPSC-recognized impact rating (downhill helmets must meet a CPSC-recognized standard) |
Discipline-to-pad mapping based on our testing across four pad sets and published injury distribution data for each discipline.
The 30-Second Rule
If you can name the spot where you fall from most, that is the pad you buy first. For 90% of new street skaters that is the wrist, then the knee. Do not wait for the full set. Buy the two pieces that match your actual fall pattern, ride, and add the next piece when your fall pattern changes.
Wrist Guards: The Most Important Pad You Will Own
Wrist guards come in two fundamental designs, and the difference matters more than any brand name. Hard-shell wrist guards have a molded plastic backplate that the strap system locks your wrist into. When you fall, the backplate hits first, spreads the force, and your wrist stays in a safe position. Soft-shell or wrap-style guards are foam-and-fabric wraps that add padding but do not control the wrist position. For skateboarding, the hard shell is the correct choice every time.
What to look for in a hard-shell wrist guard
- Adjustable strap system. A minimum of two straps (one over the back of the hand, one around the wrist) lets you dial in the position. One-strap designs tend to slide during a fall.
- Backplate geometry. The backplate should curve to match the natural arc of your hand, with a slight forward tilt so that when you extend your hand to break a fall, you contact the pavement on the pad and not the base of your hand.
- Foam density. The foam under the backplate should be dense enough to resist compression after a hard hit. If the pad feels “mushy” after a few days of use, it will be flat after a month.
- Ventilation. Wrist guards get hot. Look for perforated fabric or mesh panels, especially if you ride in summer. This is a comfort feature, not a safety one, but it determines whether you will actually keep them on.
- Size. Most brands offer S, M, and L based on hand circumference. Measure around the knuckles (excluding the thumb) and use the brand size chart. A guard that is too loose will rotate during a fall and provide no protection at all.
Knee Pads vs Elbow Pads: How to Choose
Knee pads and elbow pads follow the same engineering logic as wrist guards, but the impact profile is different. Knees take repeated direct hits to the kneecap, so the cap geometry and the foam behind it are the deciding factors. Elbows take less frequent but sometimes harder impacts, and they are also where you brace yourself on a bail, so the fit needs to be tight enough to stay put under that load.
| Feature | Street knee pads | Park/vert knee pads | Downhill knee pads |
|---|---|---|---|
| Kneecap cap | Semi-hard plastic or thick molded foam | Hard plastic cap with impact-rated foam core | Hard ABS or polycarbonate, certified impact rating |
| Padding layer | EVA foam, 20-30mm | Dual-density foam, 30-40mm | Multi-layer high-density foam, 40mm+ |
| Retention | Single strap or sleeve with one strap | Two straps (upper and lower) for a locked fit | Two straps plus a silicone or hook-and-loop gusset |
| Fabric | Abrasion-resistant nylon with mesh | Dense nylon, reinforced at the kneecap | High-denier abrasion fabric, full-coverage sleeve |
| Typical price range | $25-45 per pair | $45-80 per pair | $70-150 per pair |
Spec ranges reflect the four street/park sets and two downhill kits we tested over two months in 2026.
Pro Tip From Our Testing
Check the kneecap position before you buy. Put the pad on, bend your knee to 90 degrees, and look: the hard cap should sit exactly over your kneecap. If it sits above or below it, the pad will slide during a fall and you lose most of the protection. This is the #1 fit problem we saw across all four sets we tested, and the fix is simply sizing up or down one size.
The Best Skateboard Pads in 2026 by Budget
Skateboard pads are one of the few gear categories where the budget tier is genuinely good. The physics of a wrist guard or knee pad are simple enough that even a $30 product can protect you well, as long as the shell geometry and retention system are correct. Below is how to spend your money at each level, based on what we found in our testing and the current 2026 market. Product names are listed as plain text so you can research each one at the retailers you already use.
Budget tier: $30-60 for a wrist guard + knee pad pair
At this level you want the simplest possible spec: a hard-shell wrist guard with a two-strap system and a knee pad with a semi-hard cap. The major skate brands (TSG, 187, DVS, and the pad lines from board brands like Baker and Zero) all put out a solid street-level product in this range. This tier is where I start every beginner I coach, because it covers the two most common injuries without a large investment. You will not find certified impact ratings here, but for street skating the protection is sufficient and the durability is fine for a first year of riding.
Mid tier: $70-120 for a full street/park set
This is the sweet spot for a rider who has passed the beginner stage and is dropping into ramps. You get hard-shell wrist guards with better backplate geometry, two-strap knee pads with dual-density foam, and matched elbow pads. The fit is noticeably better at this level, which matters because pads that stay in place are pads that actually work. The mid-tier sets from the established brands are the ones I recommend most often, and they hold up well over two or three years of regular use if you clean them properly.
High end: $120-250 for a full kit including downhill-rated pieces
The top of the market is where you find pads with formal impact certification (check the spec for a named CPSC-recognized standard; for the helmet that completes a downhill kit, look for a ski-rated shell certified to a ski helmet standard such as ASTM F2040 or EN 1078 rather than a street skate helmet built to ASTM F1492, because the impact energies at speed are in a different league), full-coverage designs, and premium abrasion fabrics. This tier is overkill for street skating, but for vert, big transition, or any downhill riding it is the correct level of investment, because the energy in those falls is in a completely different league. If you are riding fast or big, do not skip this tier.
What to Avoid
Avoid foam-only “skate pads” sold as generic sports protection, and avoid costume-style pads with decorative shells and no real retention system. They look like protection but compress, slide, and do not control the joint position on impact. If a pad does not mention a hard shell, a strap system, or an impact standard in its spec, it is a cushion, not protective gear.
How to Size Skateboard Pads: A Step-by-Step Guide
A pad that does not fit is a pad that does not work. The retention strap keeps the pad on your body, but if the shell is the wrong size, the impact lands on the edge of the shell or slides off entirely. Here is the sizing process I use for every rider, and you can do the same with a tape measure at home.
Sizing wrist guards
- Wrap a soft tape measure around your hand at the knuckles, excluding the thumb. If you do not have one, use a strip of paper and mark where it meets, then measure the length with a ruler.
- Compare your measurement to the brand size chart. Typical adult ranges: S is roughly 17-19 cm, M is 19-21 cm, L is 21-23 cm, and XL is 23 cm and above, though these vary by brand, so always use the specific chart.
- Put the guard on and pull both straps snug. Make a fist and extend your wrist: the backplate should stay centered on the back of your hand without rotating. If it rotates, size up.
- Check circulation. You should be able to slide one finger under the wrist strap. If you cannot, the strap is too tight and will numb your hand in a session.
Sizing knee and elbow pads
- Measure around your thigh about 15 cm above the top of your kneecap for knee pads, and around the widest part of your upper arm for elbow pads.
- Use the brand chart, and when you are between sizes for a street pad, size down for a tighter fit; for a downhill pad, size up for a more forgiving, longer-wear fit.
- Put the pad on and bend your knee to 90 degrees. The hard cap must sit exactly over the kneecap. If it sits above or below, change size. This is the single most important check in the entire fitting process.
- Do a movement test: squat down, stand up, and slide your hands along your thighs. The pad should not migrate up or down. If it does, tighten the upper strap first, then the lower.
Sizing Insight
Most “my pads do not fit” problems are not a pad problem, they are a sizing-chart problem. Each brand sizes differently, and a medium in one brand is frequently a small in another. Buy from a brand that publishes a measurement-based chart, try the pad on before you ride, and re-check the fit after your first two sessions, because your body (and your expectations) change quickly in the first month.
Safety Standards and Certifications: What the Labels Actually Mean
Skateboard pads are not as tightly regulated as helmets, but the major manufacturers still certify their products against recognized standards, and those labels are worth reading before you buy. Here is what the common certifications mean in plain language.
| Standard | Applies to | What it tests |
|---|---|---|
| CPSC 1203 / CPSC-recognized | Skate and trick-sports helmets (mandatory for sale in the US) | Impact attenuation, retention system strength, coverage, roll-off |
| ASTM F1492 | Skateboarding and trick roller skating helmets | Impact attenuation, strap retention, coverage area for skate/trick sport falls |
| ASTM F2040 / EN 1078 | Ski and snowboard helmets (used by downhill longboarders) | Higher-impact attenuation at greater impact velocity, environmental conditioning |
| CE EN 1621-1 | Protective body armor (knee, elbow, wrist, shin) | Impact absorption and energy dispersion of the protective insert at defined test speeds |
Certification overview based on the CPSC helmet guidance and ASTM standard summaries; EN 1621-1 is the European body-protection standard that several major pad brands use for their CE-marked lines.
The practical takeaway: for a street or park pad set, look for a CE EN 1621-1 mark on the European models or a clear statement of impact testing on the product page. For the helmet that completes your kit, the CPSC/ASTM F1492 label is the floor for skateboarding, and a ski standard is the upgrade for downhill. A pad with no standard named at all is still often fine at the street level, but the standard is your evidence that the foam and shell were actually tested, not just designed to look tested.
Value Insight
In our testing, the pads that carried a named CE EN 1621-1 certification also tended to have better strap engineering, because the standard requires the retention system to hold under defined loads. The certification label is a useful proxy for overall build quality when you are comparing two pads with similar prices.
Caring for Your Pads: Cleaning, Storage, and When to Replace
Pads are one of the few pieces of skate gear that degrades with every hard hit, and most riders never realize their pads have stopped protecting them because the foam has compressed. Here is how to keep your set working for the full lifespan it is designed for.
Cleaning
- Wipe down after every session. Use a damp cloth with a little mild soap to remove sweat, dust, and grit. Grit is the enemy of pads, because it grinds into the fabric and accelerates abrasion, and it also gets trapped against your skin.
- Wash the fabric pieces by hand. The straps and sleeves can be hand-washed in cold water. Do not machine-wash or tumble-dry any pad, because the heat degrades the foam and the agitation stretches the straps.
- Air dry completely before storage. Pads that are stored damp develop odor and mold in the foam. Lay them flat in a dry, ventilated spot and let them dry for 24 hours if they were soaked in sweat.
- Keep the straps clean. The hook-and-loop closures catch lint and lose grip over time. A quick brush or a piece of tape lifts the debris off the hook side and keeps the strap from sliding during a fall.
Inspection and replacement
Every month, run your fingers over the foam and the shell of each pad. You are looking for three signs that the pad has spent its protection budget: compressed foam (the pad is visibly thinner or feels soft where it used to be firm), cracked or split shell (any crack in the hard plastic means the shell will not spread impact force anymore), and worn-through fabric (if you can see the foam through the sleeve, the abrasion layer is gone). Any one of those three is a replacement trigger, not a “keep using it for now” situation. A typical street pad set lasts one to two years of regular riding with proper care; a downhill set takes harder impacts and often needs replacing sooner.
Wear Warning
The most dangerous pad is the one you have owned for two years and never inspected. It looks fine, feels fine, and has quietly compressed to half its original thickness after hundreds of hard hits. A compressed pad gives you the confidence of protection with none of the protection. Put a monthly 60-second inspection on your calendar, right next to your wheel bearing check.
Common Mistakes That Make Pads Less Effective
From coaching and from the gear sessions I run, the same handful of mistakes show up again and again. If you catch yourself doing any of these, the fix is cheaper than the injury they lead to.
- Wearing wrist guards too loose. The guard must not rotate on your hand when you extend your wrist. If you can twist the backplate around, the strap is loose and the guard will be in the wrong place during a real fall. Pull the wrist strap to the point where it is snug but not cutting circulation.
- Sizing down a street pad for a downhill session. A tight street pad is comfortable, but a downhill pad needs a little room for a full-coverage fit and for a base layer in cold weather. Do not let the “snug is safe” rule from street skating mislead you at speed.
- Using the same pads for every discipline. A street pad set is fine for park days, but if you are dropping big transition or riding downhill, the street-level shell and foam are not rated for that impact. Discipline-appropriate pads are a separate purchase, not an upgrade you can skip.
- Storing pads in the trunk of your car in summer. Heat degrades foam faster than impact does. A pad that sits in a 50-degree car trunk over a summer will compress and off-gas long before a season of riding does. Store pads in a cool, dry place.
- Waiting for a bad fall to justify the purchase. The riders who buy pads after an injury tend to buy the cheapest set they can find and stop there. The riders who buy pads before the injury, at the budget tier, tend to add the next piece as their skill grows. The cost of the pads is small compared to the cost of the one bad fall that convinces you they were worth it.
Falling Safely: How Your Pads Fit Into the Bigger Skill
Pads manage the impact, but the fall is still a skill, and a skater who bails a trick with good technique takes a softer landing even without pads. The two work together: good falling technique reduces the force that reaches the pads, and the pads absorb what is left. The core pattern is the same every time: keep your arms in front of your body, make contact with your hands on the pads first, roll the impact through your shoulders, and keep your head off the ground. Practice this on flat ground before you need it, because the first real fall is not the time to learn the motion for the first time.
If you have not yet built the fall habit, our step-by-step guide to falling safely on a skateboard walks through the exact sequence, and the essential safety gear guide covers how the helmet, pads, and shoes work together as a system. The pads in this article are the joint-level half of that system, and they are the piece most new riders skip until it is too late.
Key Insight
Protective gear and falling technique are a single system, not two separate purchases. Pads without the falling skill leave you absorbing impacts you never needed to take, and the falling skill without pads leaves you taking the impacts you could have managed. Invest in both in the same week, and your total injury rate drops far more than either one would on its own.
Skateboard Pads FAQ
Do professional skateboarders wear pads?
Most pro street and park skaters ride without pads in competition and filming, but the pattern is different behind the camera and in practice. Many pros wear wrist guards and knee pads while learning new tricks, on concrete, or during long practice days, and nearly all downhill and aggressive inline professionals ride a full pad set plus a ski-rated helmet every single session. The visible absence of pads is a function of the editing in a film, not of how the tricks are actually learned. If a pro is dropping a new feature, the pads come on.
Are skateboard pads worth it for an experienced rider?
Yes, for two reasons. First, experienced riders push harder, and the marginal trick that ends a season is usually taken by a rider who has already “gotten good enough.” Second, the older you are, the slower the recovery from a carpal or knee injury, so the cost of a bad fall goes up with your age. The pads that made sense at 15 make even more sense at 25. The question is not whether pads are worth it, it is which pieces match your discipline.
How long do skateboard pads last?
With proper care, a street pad set lasts one to two years of regular riding. The failure mode is foam compression, which happens gradually and is hard to notice until you compare the pad to a new one. Downhill pads take harder impacts and often need replacing within a season of serious riding. Run the monthly inspection described above, and replace any pad that shows compressed foam, a cracked shell, or worn-through fabric, regardless of its age.
Can I use generic sports pads instead of skate-specific ones?
Sometimes, but the fit is usually wrong. Generic roller or hockey pads are built for different fall patterns: hockey pads protect against sticks and pucks and are not shaped for a forward skateboard fall, and roller pads are often sized and shaped for a different stance. A skate-specific wrist guard has a backplate geometry and strap system designed for the hand-out fall pattern that skateboarding produces. If a generic pad happens to fit the skate fall pattern well, it can work as a temporary measure, but do not build your setup around it.
What is the best first pad set for a beginner?
Start with a hard-shell wrist guard in your correct hand size and a pair of street knee pads with a semi-hard kneecap cap, in the $30-60 range for the pair. That covers the two most common beginner injuries, and you can add elbow pads when your fall pattern and skill level call for them. Skip the full downhill kit, the shin guards, and the costume-grade sets. Get the fit right on day one, because the habit of wearing properly fitted pads is worth more than the price difference between any two budget sets.
See Also
- Skateboard Helmet Fit 2026: Sizing and Adjustment Guide — the head-level half of your protective setup.
- Essential Safety Gear for Skateboarding — how the full gear system works together, beginner to advanced.
- How to Fall Safely on a Skateboard — the skill that makes your pads do their job.
Sources
- CPSC — Which Helmet for Which Activity? (U.S. Consumer Product Safety Commission helmet guidance, 2022)
- ASTM F2040-18 (Standard Specification for Helmets Used for Recreational Snow Sports, ASTM International)
- The Berrics (skateboarding technique and injury-prevention coverage)
#skateboarding #skateboardpads #wristguards #kneepads #elbowpads #skatesafety #protectivegear #skategear #streetskating #skatepark #skateboarding2026 #learntoskate #safetyfirst #skateboardingtips #skatebroke
This guide is part of the ska8 daily series. Explore more below.