
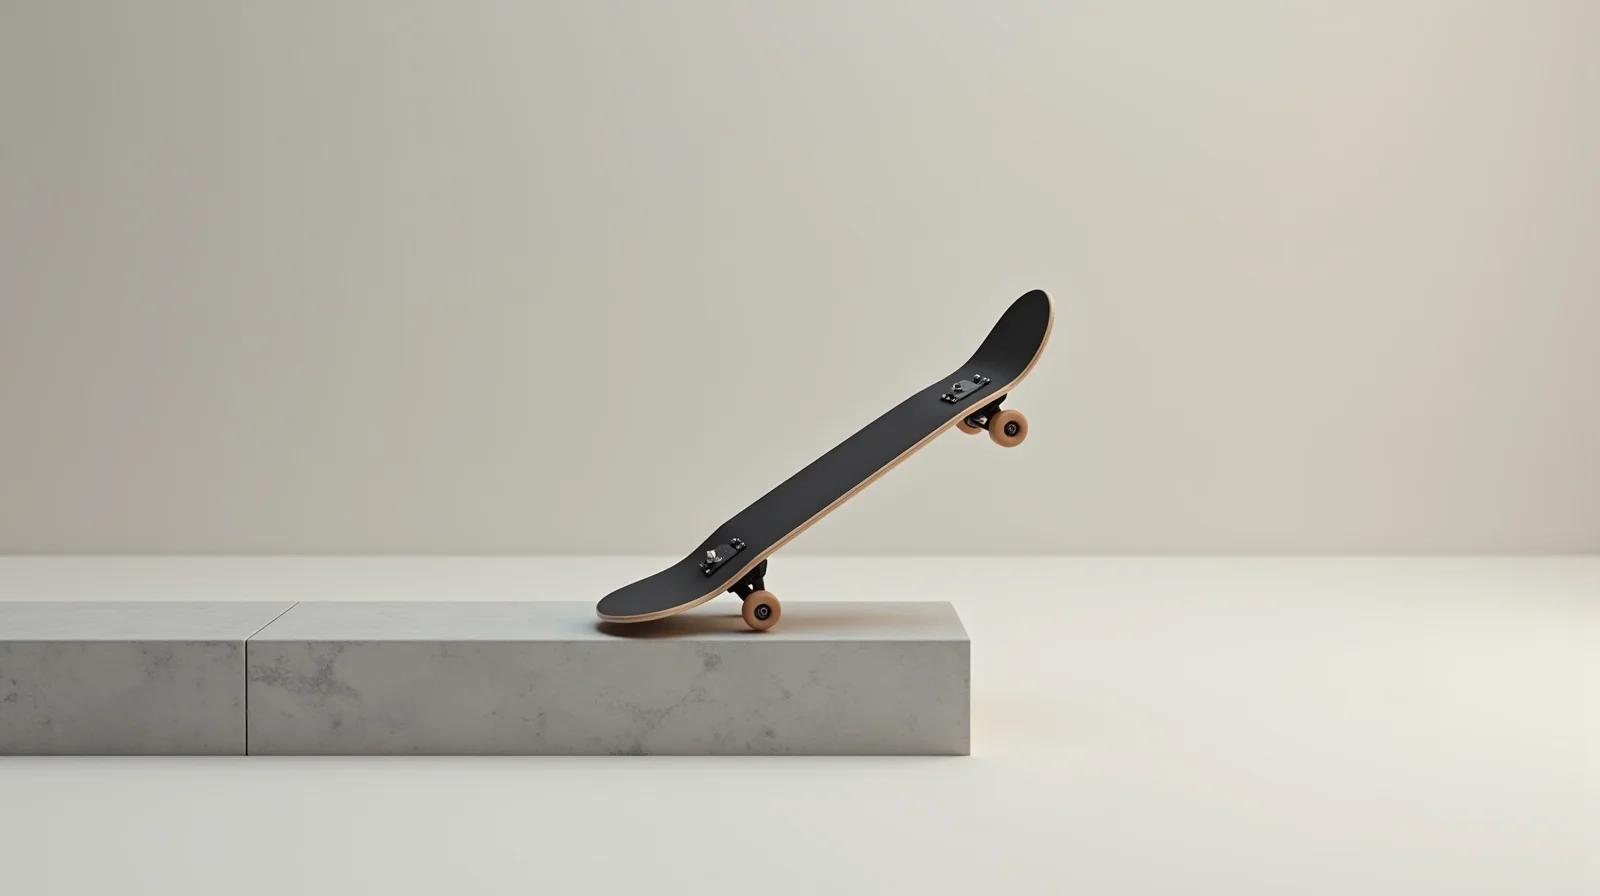
Ollieing up a curb is the trick that separates flatground practice from real street skating. It is the first moment your board has to clear an obstacle instead of just staying level above flat concrete, and it is where most beginners either find their confidence or bail hard enough to quit for a month. Done right, the curb ollie is deceptively simple: a well-timed pop, a little more speed, and a board that goes over the nosing instead of into it.
In this 2026 guide, we break the trick down into the exact approach, pop timing, and board control you need, based on a decade of coaching it to skaters from first ollie through first street lines. You will get a step-by-step progression, a reference table for choosing curbs, the eight most common mistakes (and the specific fix for each), and practice drills you can run this weekend with nothing but a sidewalk and your board.
By Tyler Brooks, Skateboarding Coach
Tyler has coached skateboarders for 10 years and has tested trucks, wheels, and protective gear on real street and park sessions.
Published: September 17, 2026
Quick Answer: How to Ollie Up a Curb
Approach a 4- to 6-inch curb at a 30 to 45 degree angle with 8 to 10 mph of speed. Set your stance slightly forward, then pop a fraction later than you would on flatground. As the tail strikes the nose, kick the back foot up and snap the board level, guiding the nose over the nosing with your front foot. Land on the front bolts with both feet and bend your knees to absorb the drop.
What we cover in this guide:
- What a curb ollie is and why it is the next step after the flatground ollie
- The exact gear and skill prerequisites (checklist)
- How to pick the right curb, with a height and shape reference table
- 8-step technique: approach angle, pop timing, board control, landing
- The 8 most common mistakes and the fix for each
- Five practice drills to bank the trick in under two weeks
- How to stay safe and progress to curbs, nose-first ollies, and street lines
What Is a Curb Ollie, and Why Learn It First?
A curb ollie is an ollie over a raised lip: the board clears the vertical face of the curb (the nosing) and lands on the upper surface. It sounds like “just an ollie,” but three things change compared to flatground:
- Timing shifts. The obstacle is moving toward you as you approach, so the same pop timing that works at 6 mph on flat ground lands you flat on the curb at 9 mph. You must pop later than instinct says.
- Angle matters. Hitting a curb dead-on (90 degrees) demands maximum height. Approaching at 30 to 45 degrees trades height for a forgiving, glancing impact that you can control with your front foot.
- The landing is two-part. You land on the front bolts, then ride out. On flatground you land and roll; on a curb, the board has to stay level through impact or the nose dips and catches the top of the lip.
From coaching, the curb ollie is the single best filter between “skater who pops in the parking lot” and “skater who can ride a street line.” Every ledge, every stair set, every bank starts from the same motor pattern: clear a vertical face at an angle with a level board. Once that pattern is automatic, ledges and 2-stair ollies are just the same trick at a different scale. That is why I teach it as the first obstacle trick, ahead of grinds and slides.
Why Not Just Ollie Straight On?
Dead-on curb ollies look clean in videos, but they require 2 to 3 inches more height than an angled approach. That extra height is exactly where beginners wobble the board mid-air. An angled approach lowers the height requirement by roughly a quarter and lets the front foot guide the board over the lip, which is why every street skater you watch uses an angle rather than a head-on hit.
Prerequisites: Gear and Skill Checklist
Before you start, verify you have the two prerequisites locked. Skipping either one turns curb practice into a frustration machine.
1. The flatground ollie is automatic
You should be able to ollie 30 to 40 feet on flat ground with your eyes on the horizon, not the board. The standard I use with students: land ten clean ollies in a row without thinking about the foot order. If your ollie still requires full concentration, spend a week on the flatground ollie progression before touching a curb. A curb will not teach you the ollie; it will just make you afraid of curbs.
2. Your setup is street-legal
Street skating is unforgiving of sloppy setup. Check these before your first session:
- Trucks: Medium-strength bushings are the sweet spot for learning curb transitions. Too soft and the board leans while you are in the air, too stiff and small bumps bite. If you are unsure, our trucks buyer guide breaks down baseplate width and hanger length by style.
- Wheels: 52 to 54mm at 99A is the standard street range. Softer 99A wheels absorb curb lip impact better than 101A, which transfers more shock through the board to your feet.
- Screws: Tighten wheel, hanger, and kingpin nuts to about 5 to 8 ft-lbs (check our screw torque guide). A loose truck that wanders mid-air is the most common cause of a “random” bail on a curb.
- Protection: For curb practice specifically, wrist guards and knee pads earn their keep. The first week on curbs is when most new bruises happen, because your instinct is to throw a hand out on the lower surface while your board is still over the lip.
Pro Tip: Do a Test Ollie Before Every New Curb
Roll past the curb, stop, turn around, and ollie the same distance in the air you expect to need, on flat ground. If your board floats cleanly at that height, the curb is in range. If the ollie wobbles or drops short, the curb is too tall for today and you will just burn out trying it. This single habit saves most beginners an hour of frustration per session.
How to Pick the Right Curb (2026 Reference Table)
Not every curb is a learning curb. In my experience, the difference between a productive 45-minute session and a burnt-out, sore-knee session is entirely in the curb you choose first. Here is the reference table I keep on my phone when scouting spots:
| Curb Type | Height | Best For | Watch Out For |
|---|---|---|---|
| Sidewalk curb (standard) | 4 to 6 in | First and second curb ollies | Round nosing slips the board over |
| Low square-nose curb | 3 to 5 in | Cleanest first attempt; sharp edge gives feedback | Short lips < 3 in wide feel like a step |
| Tall residential curb | 6 to 8 in | Once 5-in curbs are consistent | Needs 3 in more ollie height than standard |
| Raised crosswalk / gutter lip | 2 to 4 in | Warm-up reps and landing drills | Sloped profile gives less “clearing” feedback |
| Bus stop / transit platform | 8 to 12 in | Advanced; double-ollie territory | Often 12 in+ with a vertical face; do not attempt on first tries |
Heights are typical US residential measurements; check the spot in person. A “6-inch curb” is anywhere from 4.5 to 7 inches depending on the city.
Three curb traits that matter more than height
- Length of the nosing. A curb that runs 20+ feet gives you a long, consistent target and room to set your approach angle. A 12-inch lip in a driveway is technically a curb but behaves like a gap: there is no flat surface to roll onto, and the board has to hang in the air. Start long.
- Profile (round vs. square). Round nosing is forgiving — the board rolls slightly up the curve on contact, so a slightly early pop still works. Square nose is the teacher: if your timing is off, the board catches the edge and you feel it immediately. Learn on round, test on square.
- The drop on the far side. If you are ollieing up onto a sidewalk that is level, you land and roll. If the curb is a step down to a parking lot, the landing is a drop and the trick is now two problems. For your first curbs, pick a spot where the top of the curb is level with your approach or slightly higher, not a big drop-off.
Scouting Habit From 10 Years of Coaching
Before rolling, walk the curb. Kneel and look down the length of it: is the surface flat or does it crown? Is the top edge sharp, chipped, or covered in sand? A chipped lip that looks clean from standing height will catch your board nose. Thirty seconds of walking saves a week of “why does this spot feel different.”
Curb Ollie Step by Step: The Full 8-Step Technique
Here is the exact sequence, in the order your body executes it. Read it once, then go to the practice drills below — this is a motor-skill breakdown, not a theory section, so the value is in repetition, not re-reading.
1. Set your approach angle
Pick a spot where the curb runs straight and you can roll in at a 30 to 45 degree angle to the lip. At 30 degrees you clear the least height; at 45 you clear more. Start at about 30 to 40 degrees — a shallow angle that still lets your front foot guide the board over the nosing. If you hit too shallow (under 20 degrees) the board skids along the lip and stalls; too steep (over 50) and you are back to needing a full vertical pop.
2. Pick your landing point
Before you pop, choose exactly where on the curb you will land: about 12 to 18 inches in from the nosing, where the surface is flat. Looking at that spot — not the lip — is what keeps your board level. Beginners who stare at the curb edge instinctively lift the nose and stall on the top.
3. Load the tail with a little more speed
Roll in at 8 to 10 mph, a touch faster than a flatground ollie. The extra speed does two things: it keeps the board from stalling if your pop is slightly early, and it gives the front foot room to push the nose over the lip after contact. If you are under-speed, the board will hit the lip and stop dead, and your back foot will come off the tail hard.
4. Time the pop later than flatground
This is the single most important line in the whole guide. Pop a fraction later than you would on flat ground. The obstacle is moving toward you, so if you pop at the same moment you would on flat concrete, the board will meet the lip mid-rise and the nose will drop. A good feel: pop when your back foot is about 6 to 8 inches from the vertical face of the nosing, not when it is on top of it.
5. Kick up and snap the board level
As the tail strikes the nosing, kick the back foot up and snap the board level with the front foot, exactly as you do on a flatground ollie. The difference: you are not trying to float — you are trying to get the nose over the lip. Let the front foot drag the nose up and over the nosing rather than pushing it straight up. Think “roll the nose over the edge,” not “jump the board high.”
6. Guide with the front foot, not the eyes
Keep your eyes on the landing spot. The front foot does the fine steering: a small inward pressure keeps the board from drifting wide; a small outward pressure keeps it from diving into the lip. You should be able to make 2 to 3 inch corrections in the air with the front foot alone. If you cannot feel the board under the front foot, your stance is too centered.
7. Land on the front bolts, knees bent
Drop the board to the top surface and land with weight on the front bolts, then flow the back foot down to the tail. Land with both knees bent about 90 degrees — a stiff-legged landing on a curb transmits the full impact through the board and into your shins. Bent knees turn the landing into a spring and let you roll out cleanly.
8. Ride out, then reset
After landing, roll straight out for three to five feet before you think about the next rep. Do not immediately turn back and re-approach — the momentum and the adrenaline from the rep distort your next approach. Roll out, stop, breathe, then set up the next run the same way you did the first.
The One-Line Version
Shallow angle, a touch more speed, pop 6 to 8 inches before the lip, snap level, roll the nose over the edge with the front foot, land on the front bolts with bent knees, roll out. If you remember one thing from this section, make it: pop later than instinct says.
The 8 Most Common Curb Ollie Mistakes (and the Fix)
After watching hundreds of first attempts, these eight failures account for roughly 90% of bails. If your curb attempts are failing, it is almost certainly one of these:
1. Popping too early (the nose stall)
What it looks like: the tail pops, the board rises, then the nose drops and catches the top of the lip as you arrive. Why it happens: you are timing the pop for flatground, so the board peaks before you reach the nosing. The fix: slow-mo practice. Roll at half speed and deliberately pop late — so late that it feels scary. Then add speed back in 1 mph increments until the timing feels natural at 8 to 10 mph.
2. Hitting the curb dead-on
What it looks like: board meets the lip at 90 degrees, stalls, and the whole board tips forward. Why it happens: the approach line was aimed at the middle of the curb. The fix: place a visible marker (a crack in the pavement, a drain) 30 to 40 feet back and aim your nose at it, not at the curb. The curb should pass to your outside as you roll in.
3. No speed
What it looks like: the tail hits the lip and the board stops; your back foot slides off and you fall onto the lower surface. Why it happens: rolling in at flatground pace. The fix: build speed on the approach — a five-foot run-up before the pop zone. Under-speed curbs are the #1 cause of wrist injuries in the first week of practice, because the body goes over the board.
4. Staring at the lip
What it looks like: the board rises and then the nose dips into the curb. Why it happens: your eyes track the edge, and the board follows your gaze. The fix: commit to a landing spot 12 to 18 inches past the nosing and keep your chin up. If you catch yourself looking at the lip mid-air, that is the rep you just bailed on.
5. Stiff legs on landing
What it looks like: the board lands, your legs lock, and either the board flies out or you eat concrete. Why it happens: the landing is a bigger impact than a flatground ollie and the knees did not absorb it. The fix: before you even roll, set the intention “knees bent on contact.” A useful cue: land as if you are about to sit down on an invisible chair.
6. Front foot too far forward
What it looks like: the board rotates nose-first into the lip on contact. Why it happens: standing over the front bolts instead of on the bolts, so there is no leverage to snap the board level. The fix: check your stance on flat ground first. Front foot on the bolts, back foot on the tail — if the stance is wrong on flat, it will be wrong on every obstacle.
7. Trying tall curbs too soon
What it looks like: repeated attempts on a 7-inch curb, all short, with growing frustration. Why it happens: the spot looked “easy” from standing height. The fix: drop down a full category. A 4-inch curb you land 10 times in a row teaches more than 30 failed attempts on a 7-inch. Height is earned, not chosen.
8. Bailing with the board
What it looks like: the pop goes wrong, and you grab the board and fall with it instead of letting it roll away. Why it happens: the instinct to save the gear. The fix: let the board go. A $120 deck is cheaper than a wrist sprain. If you keep grabbing the board mid-bail, spend a session practicing falling without holding the board — the skill that protects you on every obstacle, not just curbs.
Mistake Frequency, From a Decade of Coaching
Rough breakdown of first-week bails across the skaters I coach: early pop 30%, under-speed 25%, staring at the lip 20%, stiff landing 15%, stance/angle issues 10%. If you are bailing, start with those three buckets — they cover three-quarters of all first-week falls.
Practice Drills: Bank the Curb Ollie in Two Weeks
Talent is not what gets the curb ollie banked — session design is. Here is the drill progression I use with students. Each drill has a concrete target; when you hit it, move on. If a drill fails for three straight sessions, drop one level and rebuild there.
Drill 1: The shadow curb (Session 1, 20 minutes)
- Roll your approach line at full speed without popping — 10 reps, focusing only on angle and where your back foot would meet the lip.
- On reps 6 to 10, pop a full ollie at the exact moment you would have hit the curb, landing on the ground.
- Target: 5 of 10 reps land with the board level and eyes up, no bail.
Drill 2: The 2-inch step (Session 2, 20 minutes)
- Find a 2-inch step or gutter lip (or lay a piece of foam on the ground as a stand-in).
- Ollie onto it with the exact same sequence: shallow angle, late pop, front-foot guide, front-bolt landing.
- Target: 10 clean landings in a row. The trick is the same at 2 inches; the surface is just smaller and safer while you build the timing.
Drill 3: The real curb, low and slow (Sessions 3-4, 30 minutes)
- Pick a 4-inch curb with a long straight nosing.
- Start at half your normal speed and pop late — so late it feels wrong.
- Add 1 mph each session until you are at 8 to 10 mph.
- Target: 3 clean landings per session at full speed. Do not chase more than 3; the neural consolidation happens between reps and between days, not inside a 3-hour grind.
Drill 4: The landing bank (Sessions 5-6, 30 minutes)
- Once 3-in-a-row is consistent, shift the focus entirely to landing: bent knees, front-bolt contact, 5-foot roll-out.
- Do 10 reps with the explicit rule: the rep does not count unless the roll-out is smooth.
- Target: 5 smooth roll-outs in a row. A curb ollie with a good landing but a wobbly air section is 80% done; the air section fixes itself once the landing stops being a problem.
Drill 5: The angle ladder (Session 7+)
- Work the same curb at three angles: 25 degrees, 35 degrees, 45 degrees.
- Two clean reps at each angle per session.
- Target: clean at all three angles. This is what turns a “I can do that one curb” trick into a general skill — because the next ledge in your line will not be at 35 degrees.
Session Math
At seven 30-minute sessions over two weeks, the typical progression lands the curb ollie between session 5 and 7. The skaters who learn it fastest are not the ones who practice longest — they are the ones who stop at three good reps instead of grinding into frustration. Two weeks, seven sessions, one banked trick. That is the deal.
Staying Safe: Protecting Yourself While You Learn
The curb ollie is where most first serious skate injuries happen, and almost all of them are preventable. Here is the safety framework I give every new student before their first curb session.
Wear the two pieces that actually prevent injury
Wrist guards and knee pads. These are not optional and they are not for beginners — they are the standard for curb practice specifically, because the bail mechanics on a curb (body going over the lip, hand hitting the lower surface) are exactly the mechanics that sprain wrists and scrape knees. A helmet is the third piece; it is strongly recommended for any curb over 6 inches or any spot with a hard landing, and it is the standard I hold for every student under 18. For general protection choices, see the essential safety gear guide and the deeper injury prevention guide.
The bail you are trying to prevent
The signature curb injury is the over-the-lip wrist sprain: the tail catches or the pop is early, the body keeps moving forward and up over the lip, and the first thing that hits the lower concrete is a braced hand. Two habits prevent it:
- Wrist guards with a hard back plate turn a direct impact into a roll, which is the difference between a sprain and a bruise.
- Letting the board go. If you are falling, your hands go to the ground, not to the board. A board is replaceable; a torn ligament is not. Practice this specific move (fall, let go, roll) on flat ground first.
Read the surface, not just the curb
Check three things before every session: the surface on top of the curb (debris, cracks, oil), the surface on the lower side (loose gravel, drainage grates), and the surface behind you (a car, a bike lane, a pedestrian path). A clean curb on a dirty landing is still a bad landing. Grates in particular are a trap — they look like flat concrete and they swallow a board wheel instantly.
The Two-Second Spot Check
Before every rep: eyes up the length of the curb, one glance down the lower surface, one glance behind. Two seconds, three glances. It is the cheapest insurance in skateboarding and it is the difference between “I bailed, no big deal” and “I bailed into a grate.”
Progression: From Curbs to Ledges, Stairs, and Street Lines
The curb ollie is not a destination — it is the foundation. Once it is banked (3 clean reps at three different angles, on a 4 to 5-inch curb), here is the natural path forward.
Step 1: The ledge (the same trick, different scale)
A ledge is a curb with a shorter lip. The technique is identical: shallow angle, late pop, front-foot guide, front-bolt landing. The only real difference is that a ledge lip is shorter, so the board has less surface to guide over and the timing window is tighter. Start with 4-inch ledges that are at least 6 inches wide on the top. If you are looking for the next trick after curbs, the grind guide is where the ledge family branches into slides and grinds.
Step 2: The 2-stair ollie
A 2-stair set is a curb ollie with a drop. The technique is the same, but the landing is a 5 to 6-inch drop instead of a level surface, so the front-bolt landing and bent knees are doing more work. Do not jump straight to 3-stairs; the 2-stair is the first real drop and it teaches you the landing depth you will need everywhere else. For the spin variations that use the same pop timing, see the frontside and backside 180 guide.
Step 3: The street line
A street line is three or more obstacles in a row: a curb, a gap, a ledge. The curb ollie is the first obstacle in most lines, so being fluent on it is what lets you focus on the transitions between tricks instead of the tricks themselves. When you are ready to string obstacles together, the skateboarding glossary will have the language for reading a line (approach, gap, landing, roll-out).
Why This Progression, in This Order
Curb, ledge, 2-stair, line — each step adds exactly one new variable (shorter lip, drop, transitions) while keeping the core pop timing constant. Skaters who skip ahead (straight to 3-stairs or straight to lines) are not going faster; they are stacking unlearned variables and bailing for reasons they cannot diagnose. One variable at a time is the whole secret.
Curb Ollie FAQ
How tall of a curb can a beginner ollie over?
Start at 4 inches. If your flatground ollie is clean and consistent, a 4 to 5-inch curb is the right first target, and most skaters land it within their first two to three curb sessions. A 6 to 8-inch curb is the next step, and anything over 8 inches is an advanced transition that usually needs a double ollie. The rule of thumb: if you can ollie 6 inches on flat ground, you can clear a 4-inch curb at an angle.
Do I ollie up the curb with more or less speed than flatground?
More. Aim for 8 to 10 mph on the approach, a touch faster than a flatground ollie. The extra speed is what keeps the board from stalling if your pop is a hair early, and what gives the front foot room to roll the nose over the lip. Under-speed is the single most common cause of a stalled curb attempt and a wrist hit on the lower surface.
Should I hit the curb at an angle or straight on?
At an angle — 30 to 45 degrees, starting around 30 to 40. A dead-on hit demands 2 to 3 inches more ollie height than an angled approach, and the extra height is exactly where the board wobbles. An angled approach lets the front foot guide the board over the nosing, which is why virtually every street skater uses an angle rather than a head-on hit.
What gear do I need before trying curb ollies?
A board with medium-strength bushings, 52 to 54mm wheels in the 99A range, tight screws (5 to 8 ft-lbs), and wrist guards plus knee pads for the session. The board setup matters less than you think at this stage — a clean flatground ollie and a proper landing are 90% of the result. For the full setup breakdown, see the first skateboard buyer’s guide.
How long does it take to learn the curb ollie?
For a skater with a clean flatground ollie, typically one to two weeks of short, structured sessions: seven 30-minute sessions using the drill progression above. The trick lands between session 5 and 7 for most people. The skaters who learn it fastest are the ones who stop after three good reps and let the skill consolidate between days, not the ones who grind for three hours and burn out.
See Also
- How to Ollie: Step-by-Step Guide for 2026 — the flatground foundation this trick builds on
- Best Skateboard Trucks in 2026 — bushing strength and baseplate width for street transitions
- How to Fall Safely on a Skateboard — the bail skill that protects every obstacle attempt
Sources
- Rider — safety gear standards and protective equipment used in curb practice
- Ollie — historical and technical overview — origin of the ollie and the mechanics of the board snap
- ASTM International — standards for skateboard components and protective equipment
#Skateboarding #CurbOllie #StreetSkating #HowToSkateboard #SkateTricks #LearnSkateboarding #SkateboardingTips #Ollie #Skateboarding2026 #SkateboardingSkills #StreetSkate #SkateboardTricks #SkateboardingGuide #SkateLife #SkateboardingCoach
This guide is part of the ska8 daily series. Explore more below.